Webex Workspace Integration
The Webex Workspace Integration allows you to connect your Aida Platform site with Cisco Webex devices, enabling smart building controls directly from Webex Room Navigator devices and other Webex endpoints.
Overview
This integration provides:
- Device Discovery: Automatically discover Webex devices in your organization
- Panel Management: Create custom control panels for building automation
- Real-time Control: Control lights, shades, HVAC, and other building systems from Webex devices
- Webhook Monitoring: Track device interactions and system events
- Controller Assignment: Link Webex devices to specific building controllers
- Voice Control (optional add-on): Aida Webex Assistant skill — hands-free commands after workspace integration is working; requires a separate enable step in Control Hub → Assistant Skills
Integration Architecture
The Webex Workspace Integration supports two topologies. Choose based on whether Webex device interaction data may leave the building network.
Cloud architecture (default)
In the default topology, Webex devices send widget webhooks to the Aida Platform cloud API. The platform relays events to the assigned on-premises controller over MQTT. Commissioning (OAuth, manifest, device discovery) and panel management remain in the Aida Platform UI.
Platform webhook URL (auto-generated in the Webex Integration UI; configured in Control Hub during activation):
https://api.aida-platform.com/api/webex/webhook?siteId=<site-id>
Local webhook architecture (on-premises)
For customers who require Webex device data to stay on the local network — without passing through a third-party cloud — point the integration webhook at the on-premises Aida Controller instead of the Aida Platform. Webex room devices POST widget events directly to the controller LAN address; execution happens locally with no cloud relay for event data.
Control Hub commissioning, manifest upload, and panel configuration can still use the Aida Platform UI. Only the webhook target URL changes to the controller's local endpoint.
| Cloud (default) | Local webhook (on-premises) | |
|---|---|---|
| Webhook destination | Aida Platform (api.aida-platform.com) | Aida Controller (site LAN) |
| Device event data leaves building? | Yes — HTTPS to platform cloud | No — stays on local network |
| Controller event ingress | MQTT from platform | Direct HTTP POST to controller |
| Best for | Multi-site, cloud-managed deployments | Data residency, air-gapped sites, lower event latency |
Local webhook URLs — set this as the Webhook URL in the Aida Platform integration form (or in Control Hub / device macro) instead of the platform cloud URL:
| Controller | Local webhook URL |
|---|---|
| Aida Controller 2.0 | POST https://<controller-host>/api/v1/webex/webhook |
| Aida Controller 1.0 | POST https://<controller-host>/api/v1/webex/webhook (requires Controller 2.0 runtime — see note below) |
Replace <controller-host> with the controller's LAN hostname or IP (for example 192.168.1.186). Use http:// only on trusted building VLANs where TLS is not required. The endpoint is unauthenticated; network segmentation on the AV/building LAN is the trust boundary (same model as other local event ingress on the controller).
On Controller 2.0, enable the Webex Control Hub module before accepting webhooks. The controller validates the payload, matches pre-configured action mappings, and executes only known device_id + widget pairs.
:::note Controller 1.0 and local webhooks
Legacy Controller 1.0 deployments receive Webex widget events via the cloud MQTT relay (first diagram). Direct on-premises webhook ingress (/api/v1/webex/webhook) is implemented on Controller 2.0 (v0.46.0+). Sites that require local webhook delivery should run Controller 2.0 with the Webex Control Hub module enabled.
:::
Prerequisites
Before setting up the integration, ensure you have:
- Webex Control Hub Access: Admin access to your organization's Webex Control Hub
- Aida Platform Site: An active site configured in the Aida Platform
- Network Connectivity:
- Cloud architecture: Webex devices must be able to reach the Aida Platform API (
api.aida-platform.com) - Local webhook architecture: Webex devices must be able to reach the on-premises Aida Controller on the building LAN (HTTPS or HTTP on a trusted VLAN)
- Cloud architecture: Webex devices must be able to reach the Aida Platform API (
- Controller Access: At least one Aida Controller configured and accessible
Setup Process
Step 1: Create Integration in Aida Platform
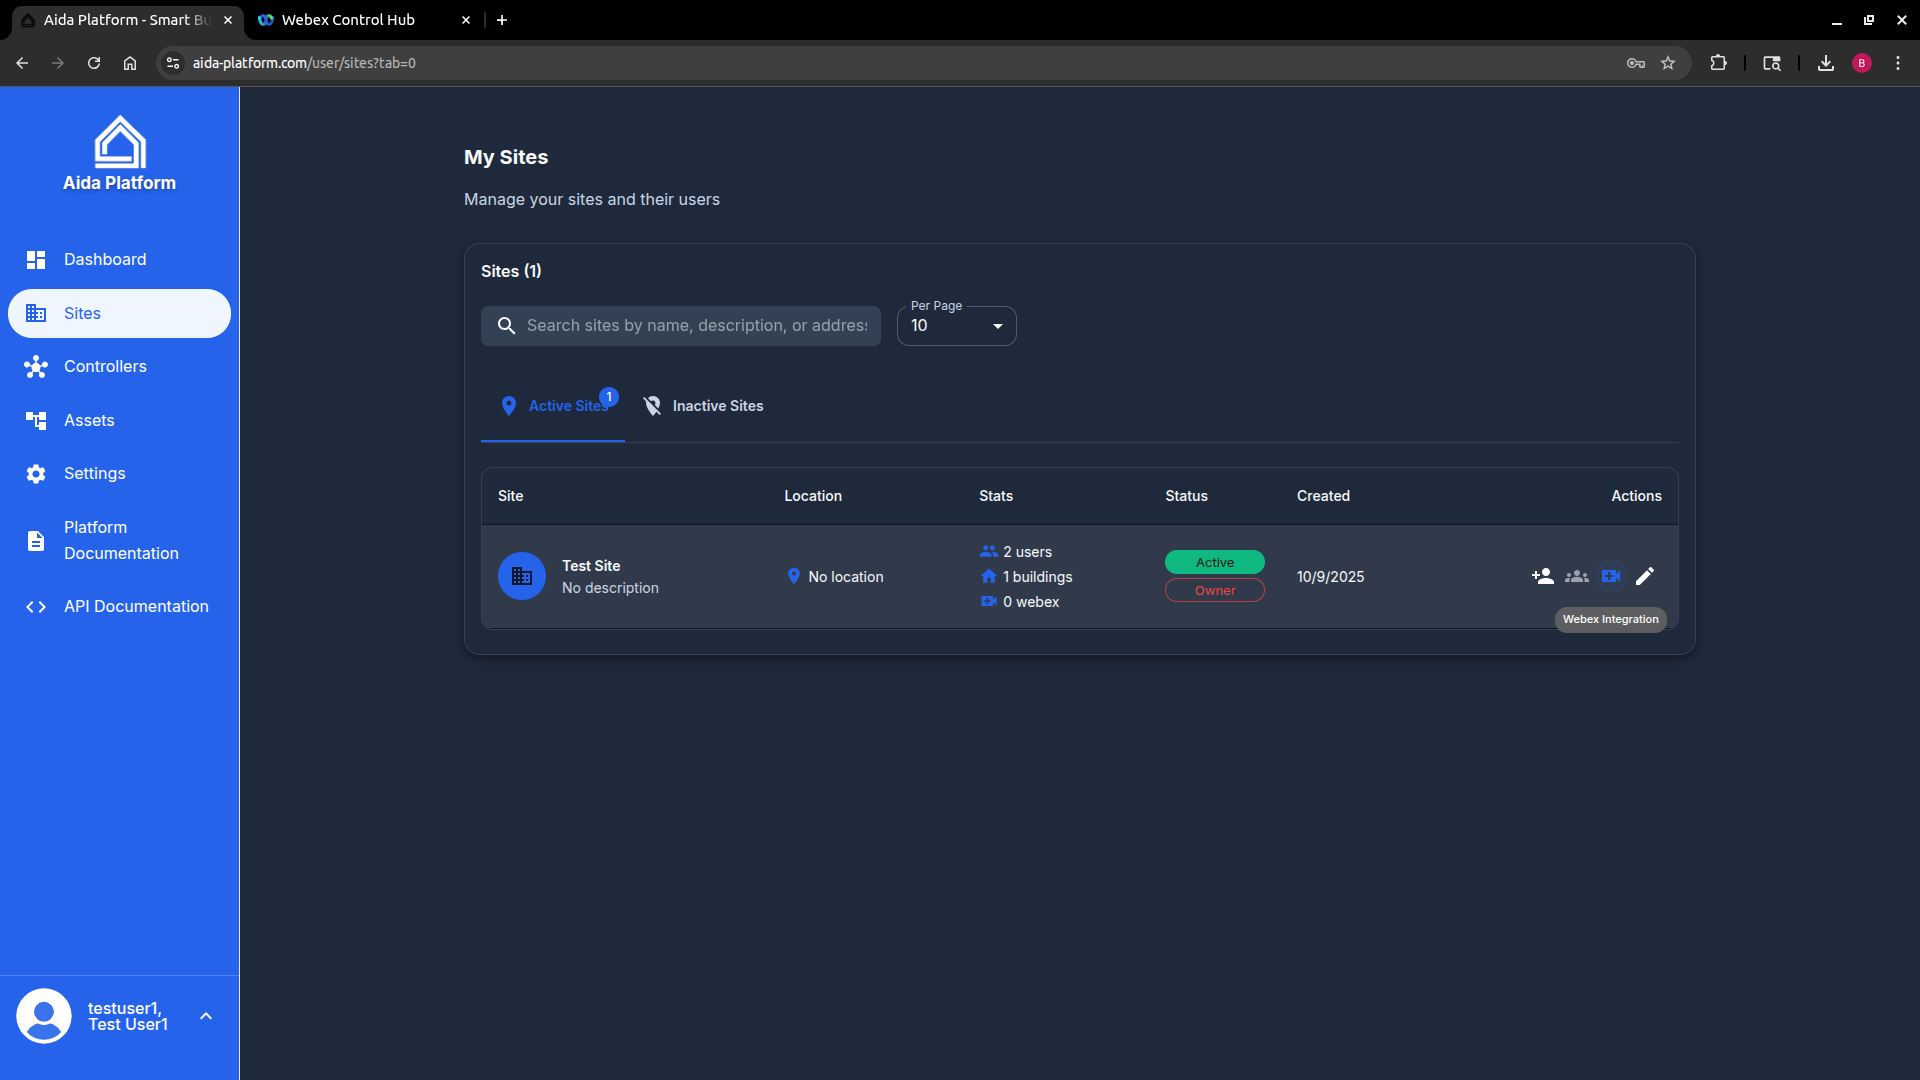
- Navigate to Site Management
- Go to your Aida Platform dashboard
- Select the site where you want to add Webex integration
- Click on "Webex Integration" in the integrations section
- Add New Integration
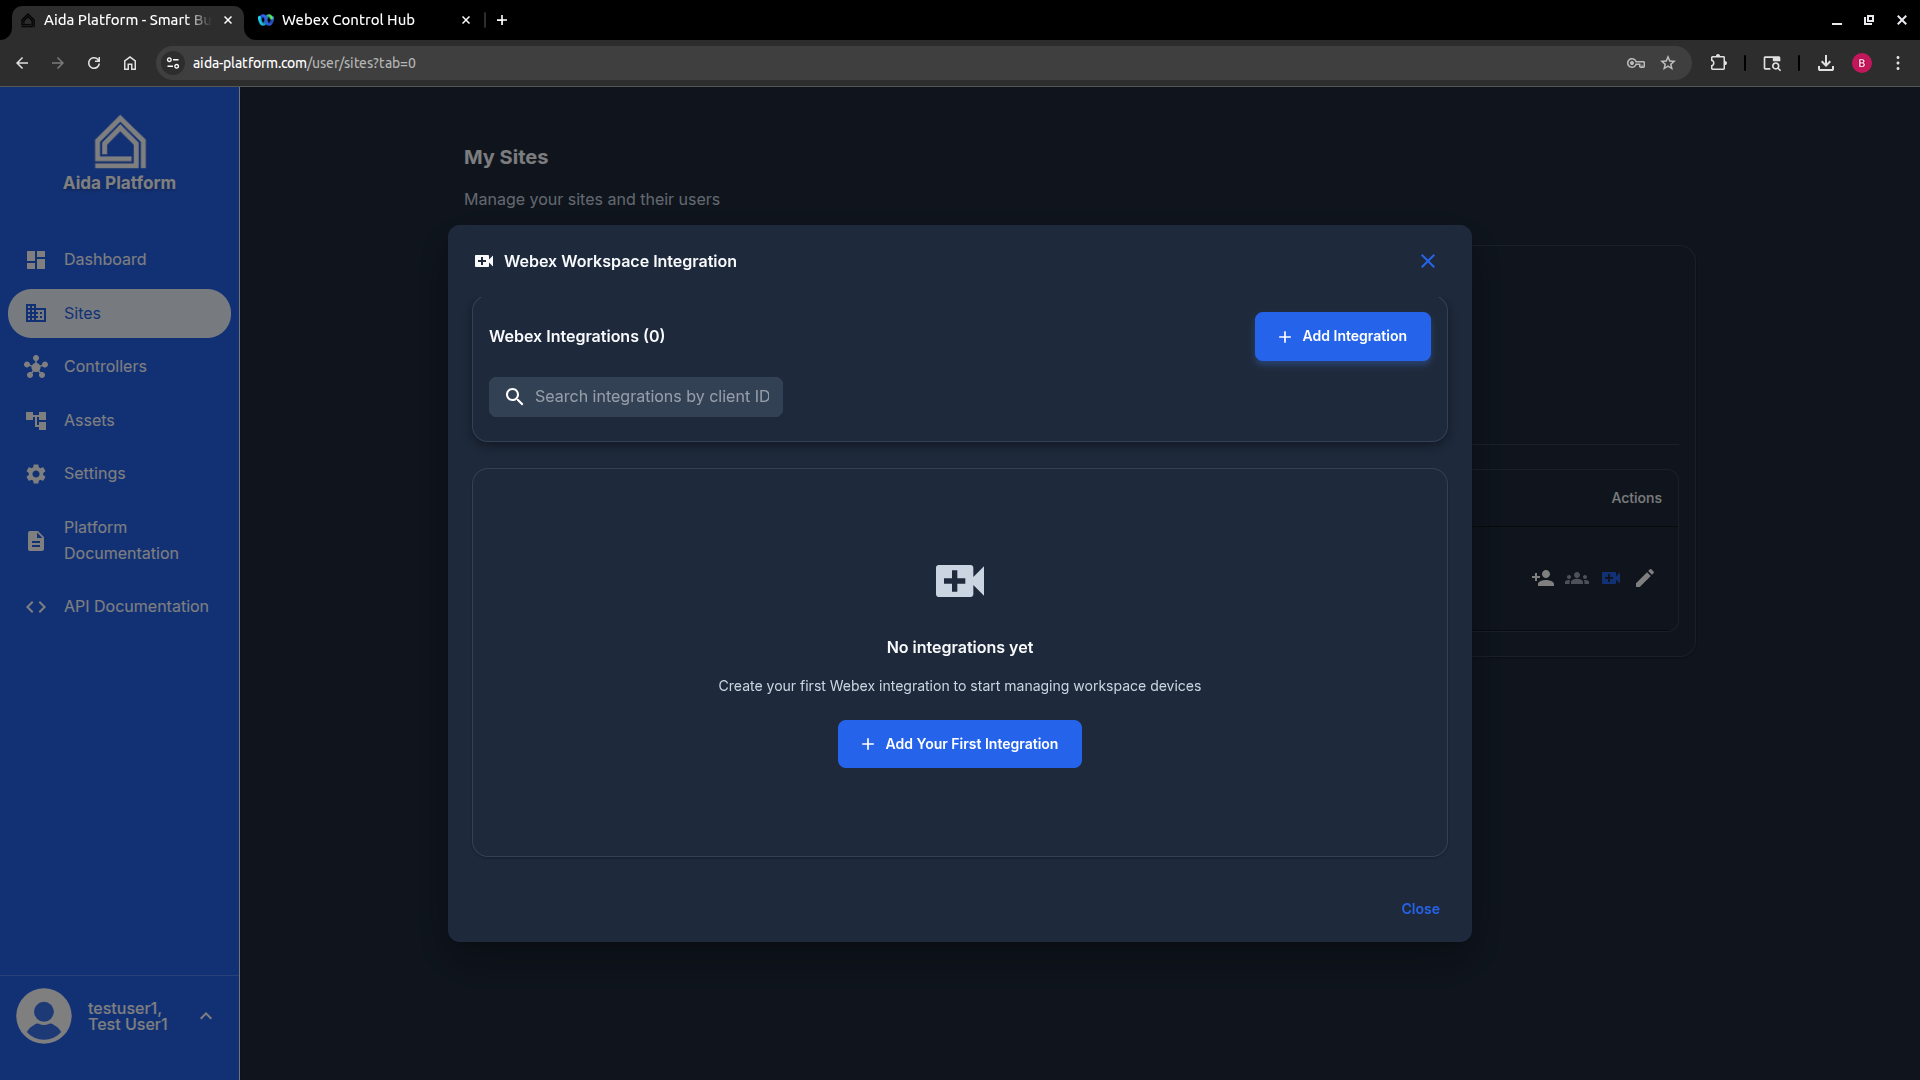
- Click "Add Integration" button
- Fill in the required information:
- Client ID: (Will be obtained from Webex Control Hub)
- Client Secret: (Will be obtained from Webex Control Hub)
- Webhook URL: Choose Cloud (platform relay) or Local controller in the integration form (see Local webhook architecture)
- Cloud: auto-generated platform URL (
/api/webex/webhook?siteId=...) - Local: pick a site controller, enter its LAN hostname/IP, and copy the generated controller URL (
/api/v1/webex/webhook)
- Cloud: auto-generated platform URL (
- Download Manifest File
- Click "Download Manifest" to get the integration manifest
- Save the
manifest.jsonfile to your local machine - This file contains the integration configuration for Webex
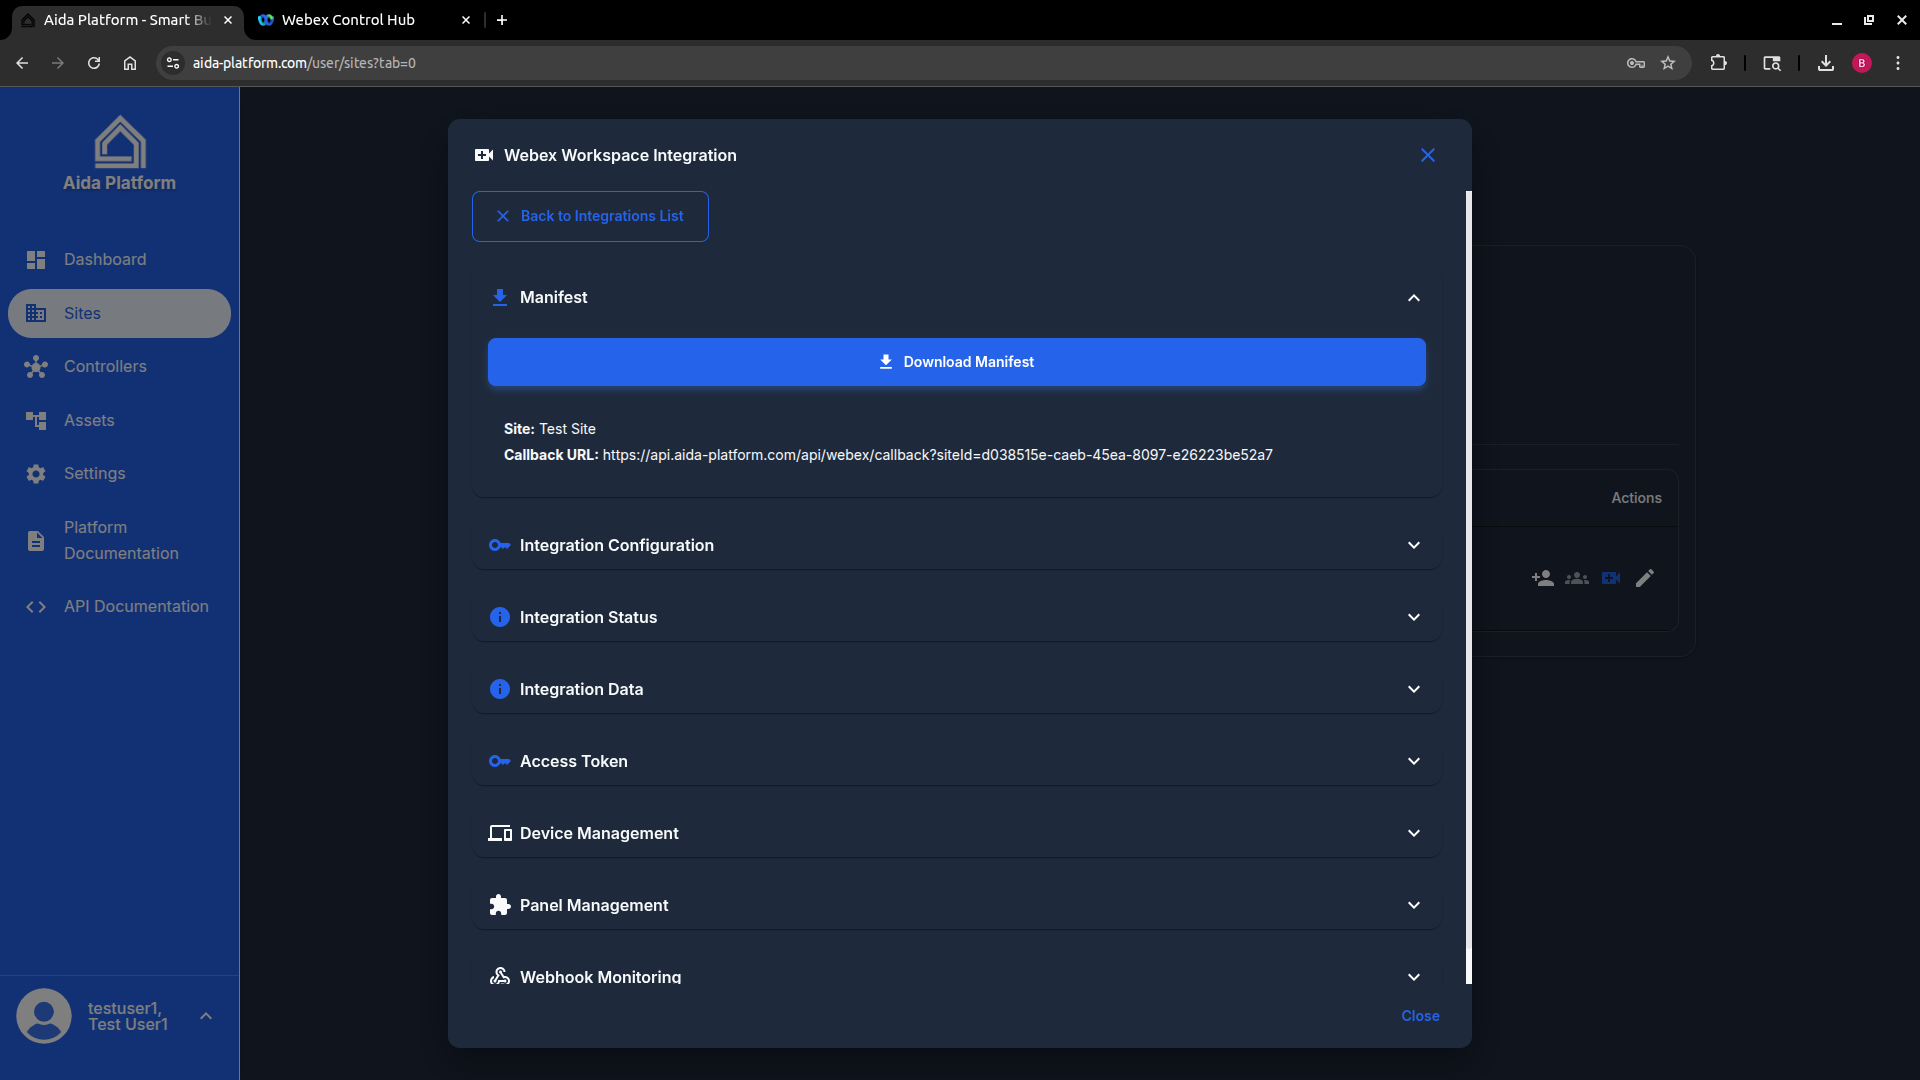
Step 2: Configure in Webex Control Hub
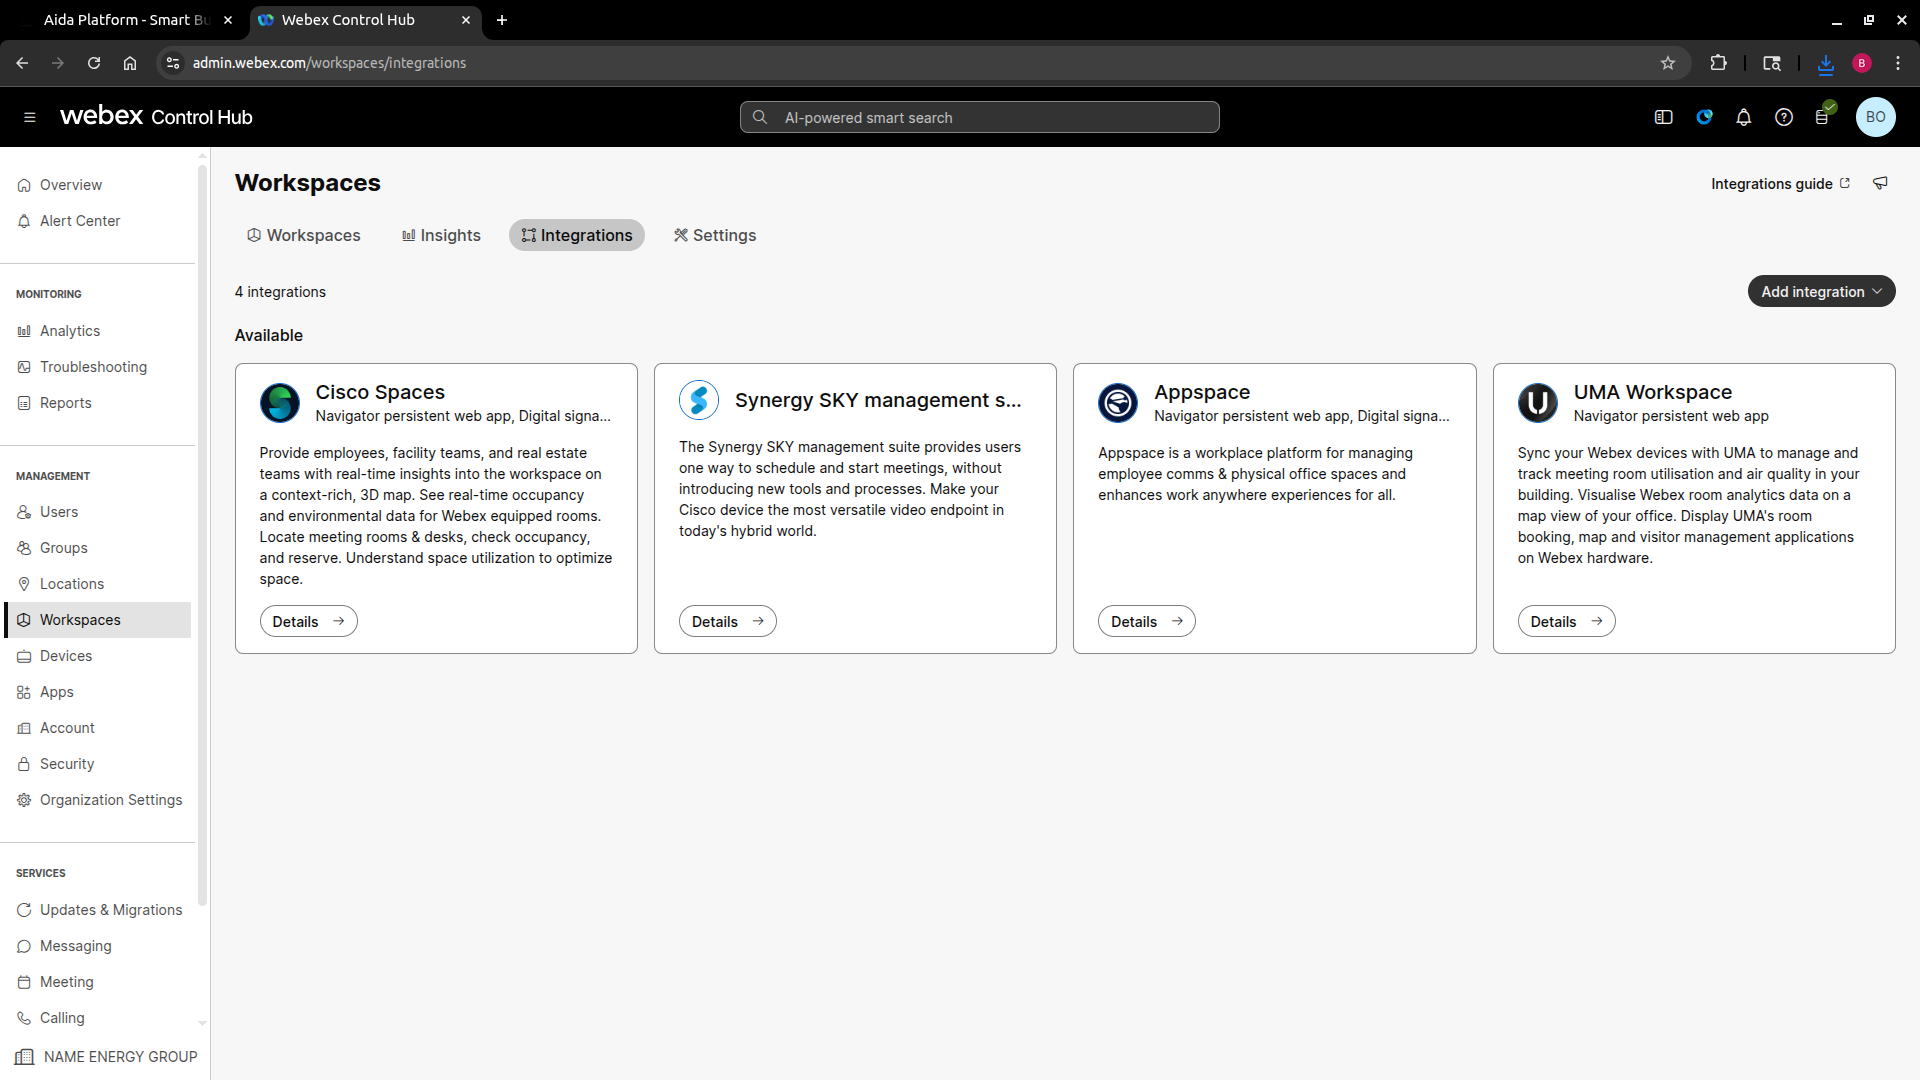
- Access Webex Control Hub
- Go to admin.webex.com
- Log in with your admin credentials
- Navigate to "Workspaces" → "Integrations"
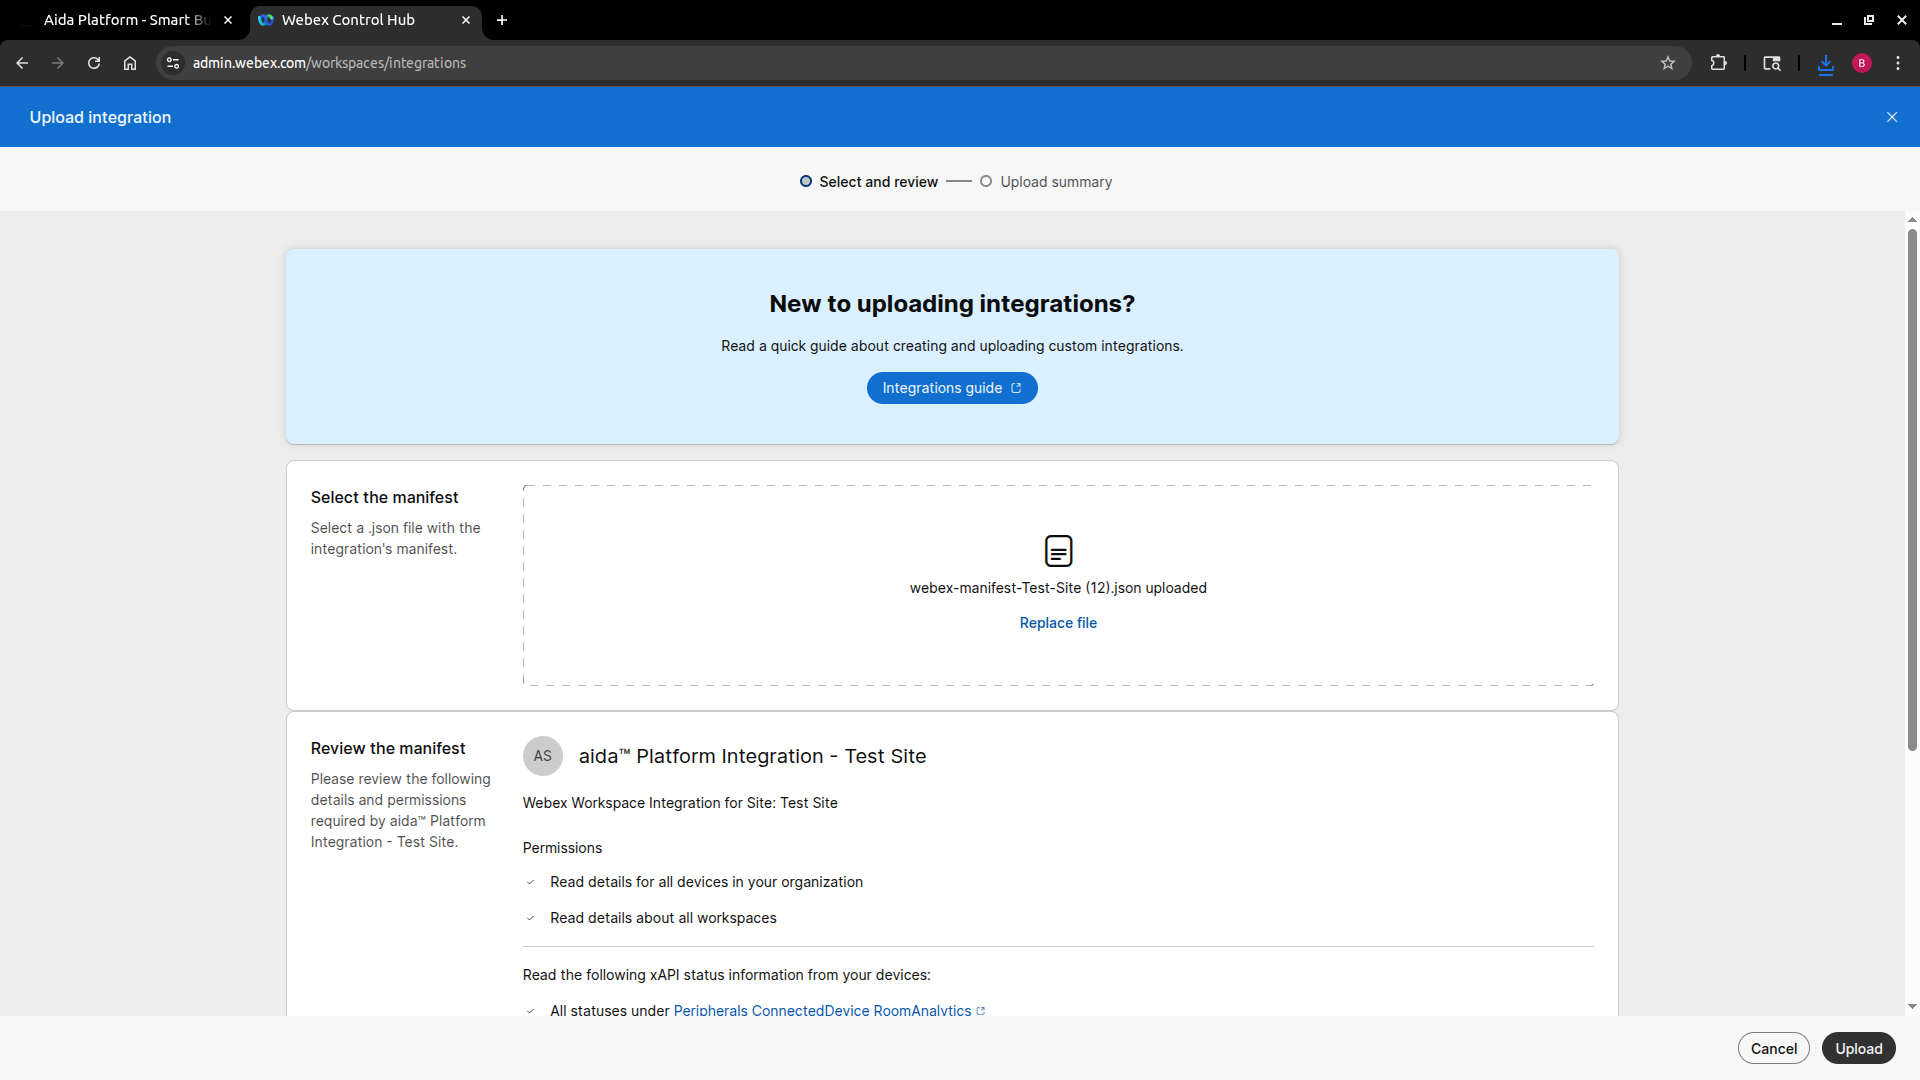
- Add Integration
- Click "Add Integration"
- Select "Upload Integration"
- Choose the manifest file downloaded from Aida Platform
- Click "Upload"
- Get Credentials
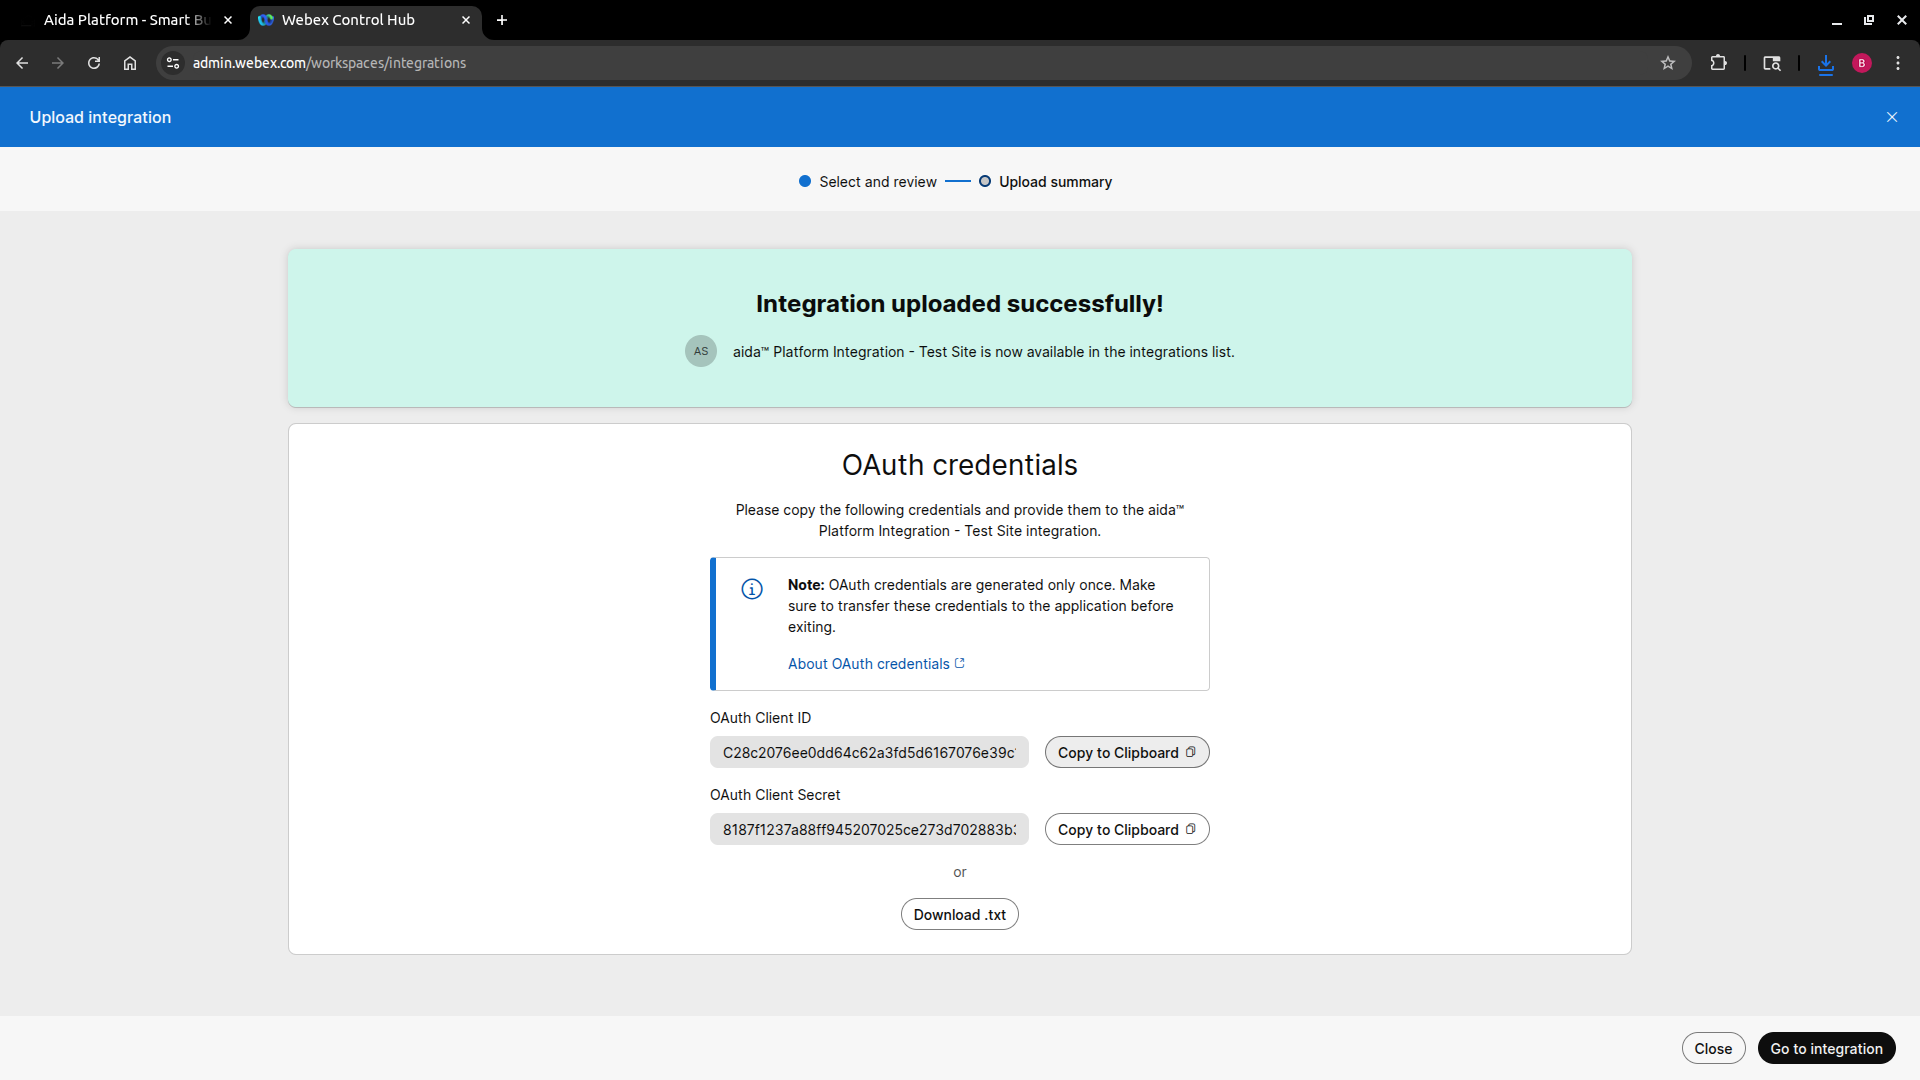
- After successful upload, you'll see the integration details
- Copy the Client ID from the integration page
- Copy the Client Secret from the integration page
Step 3: Complete Integration Setup
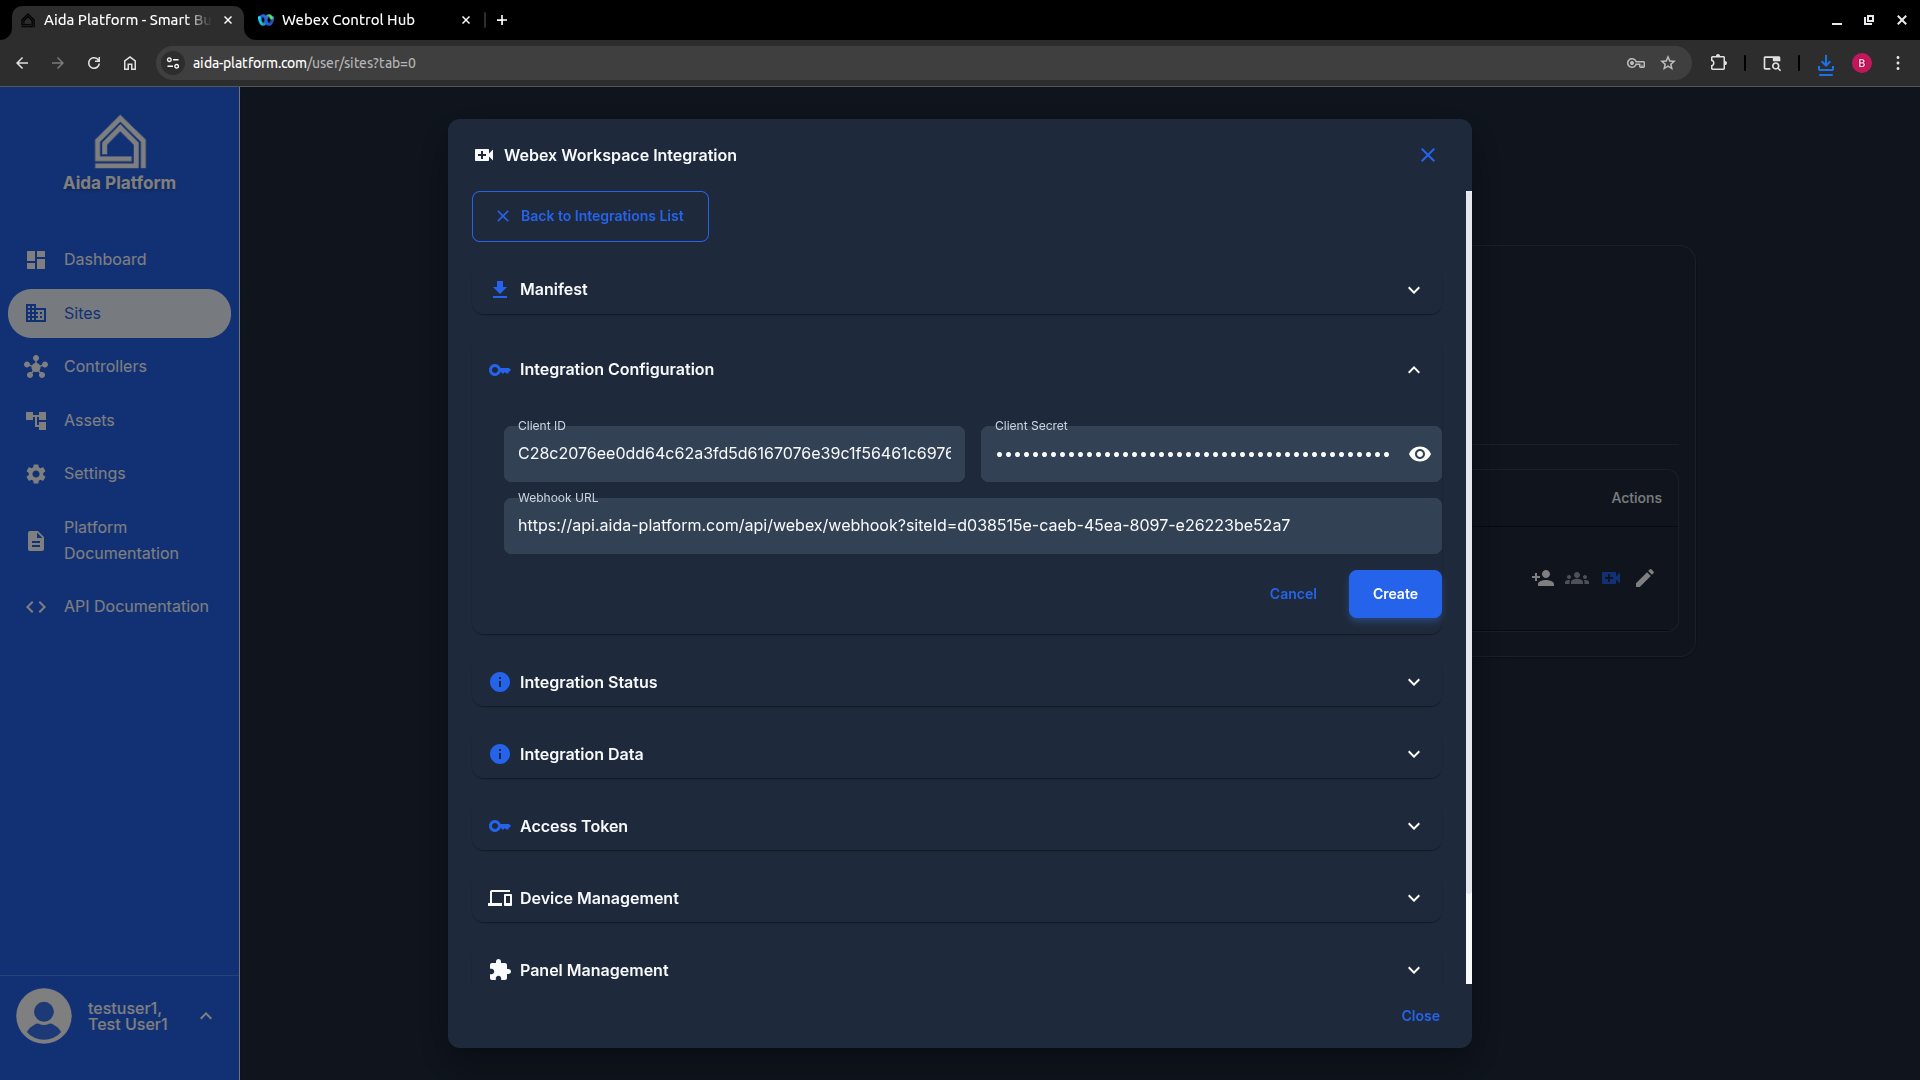
- Return to Aida Platform
- Go back to the Webex Integration page
- Paste the Client ID from Webex Control Hub
- Paste the Client Secret from Webex Control Hub
- Review the Webhook URL field (see below if using on-premises delivery)
- Click "Create" to save the integration
Webhook URL — cloud vs local controller
By default, the Webhook URL is pre-filled with the Aida Platform cloud endpoint:
https://api.aida-platform.com/api/webex/webhook?siteId=<site-id>
This is correct for the cloud architecture. Webex devices send widget events to the platform, which relays them to the controller over MQTT.
If your site requires on-premises webhook delivery — Webex device data must not pass through the Aida Platform cloud — replace the default URL with your local controller endpoint before clicking Create (or Update on an existing integration):
https://<controller-host>/api/v1/webex/webhook
| Item | Detail |
|---|---|
<controller-host> | LAN hostname or IP of the Aida Controller assigned to the site (e.g. 192.168.1.186) |
| Controller version | Aida Controller 2.0 with the Webex Control Hub module enabled |
| Protocol | https:// recommended; http:// acceptable on a trusted building VLAN only |
| When to set | Before first Create, or edit the integration and click Update to change later |
Example (local):
https://192.168.1.186/api/v1/webex/webhook
Steps to switch to a local controller URL:
- In the Webex Integration dialog, open Integration Configuration
- Clear the auto-generated platform URL in the Webhook URL field
- Enter
https://<controller-host>/api/v1/webex/webhookusing the controller's LAN address - Confirm the assigned controller is reachable from Webex devices on the building network
- Click Create (or Update if editing an existing integration)
- Complete activation in Control Hub (step 2 below) — the platform registers this URL with Cisco during activation
:::tip Verifying reachability
From a machine on the same VLAN as the Webex room device, confirm the controller responds before activation. A POST with a test payload to /api/v1/webex/webhook should return a response (not a connection timeout). See Local webhook troubleshooting if events do not arrive.
:::
Leave the default platform URL unchanged if you are using the cloud architecture and do not have a data-residency requirement for webhook payloads.
-
Activate Integration in Webex
- Return to Webex Control Hub
- Go to your integration
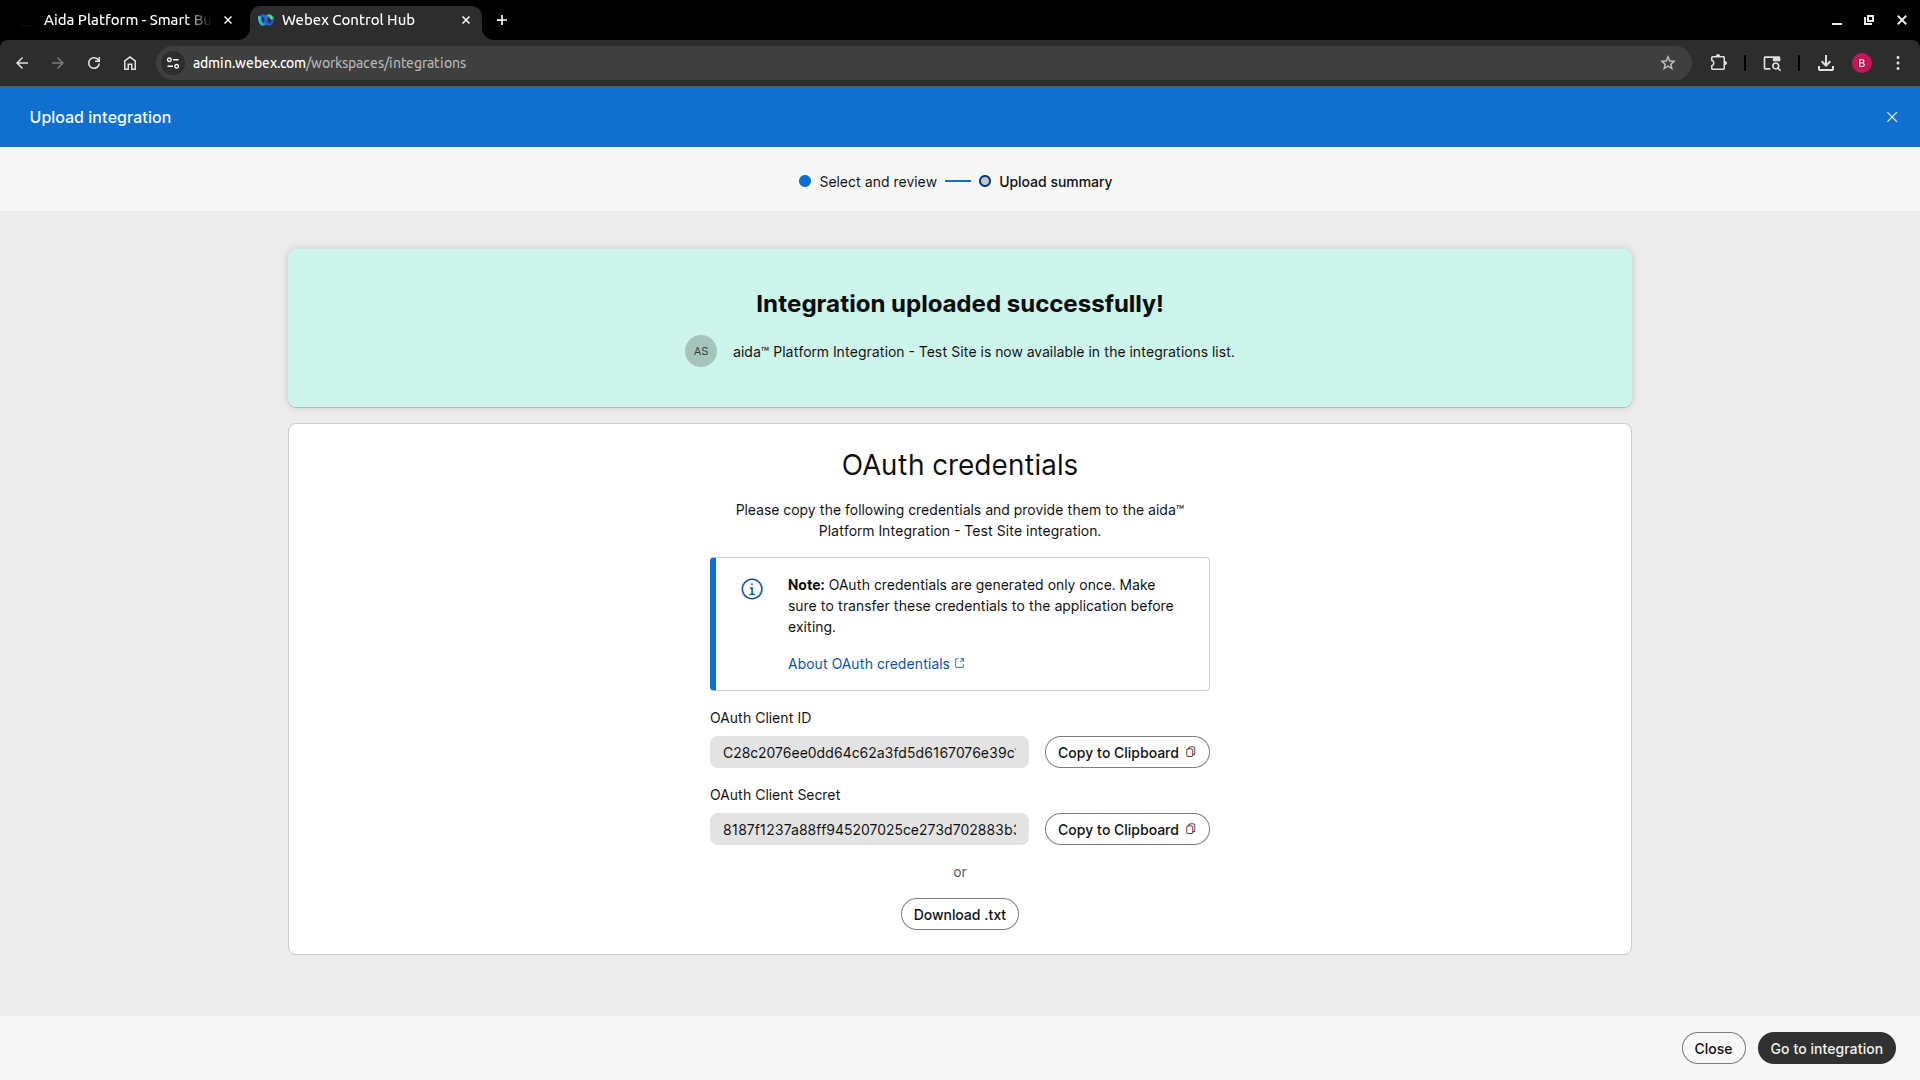
- Select "Activate"
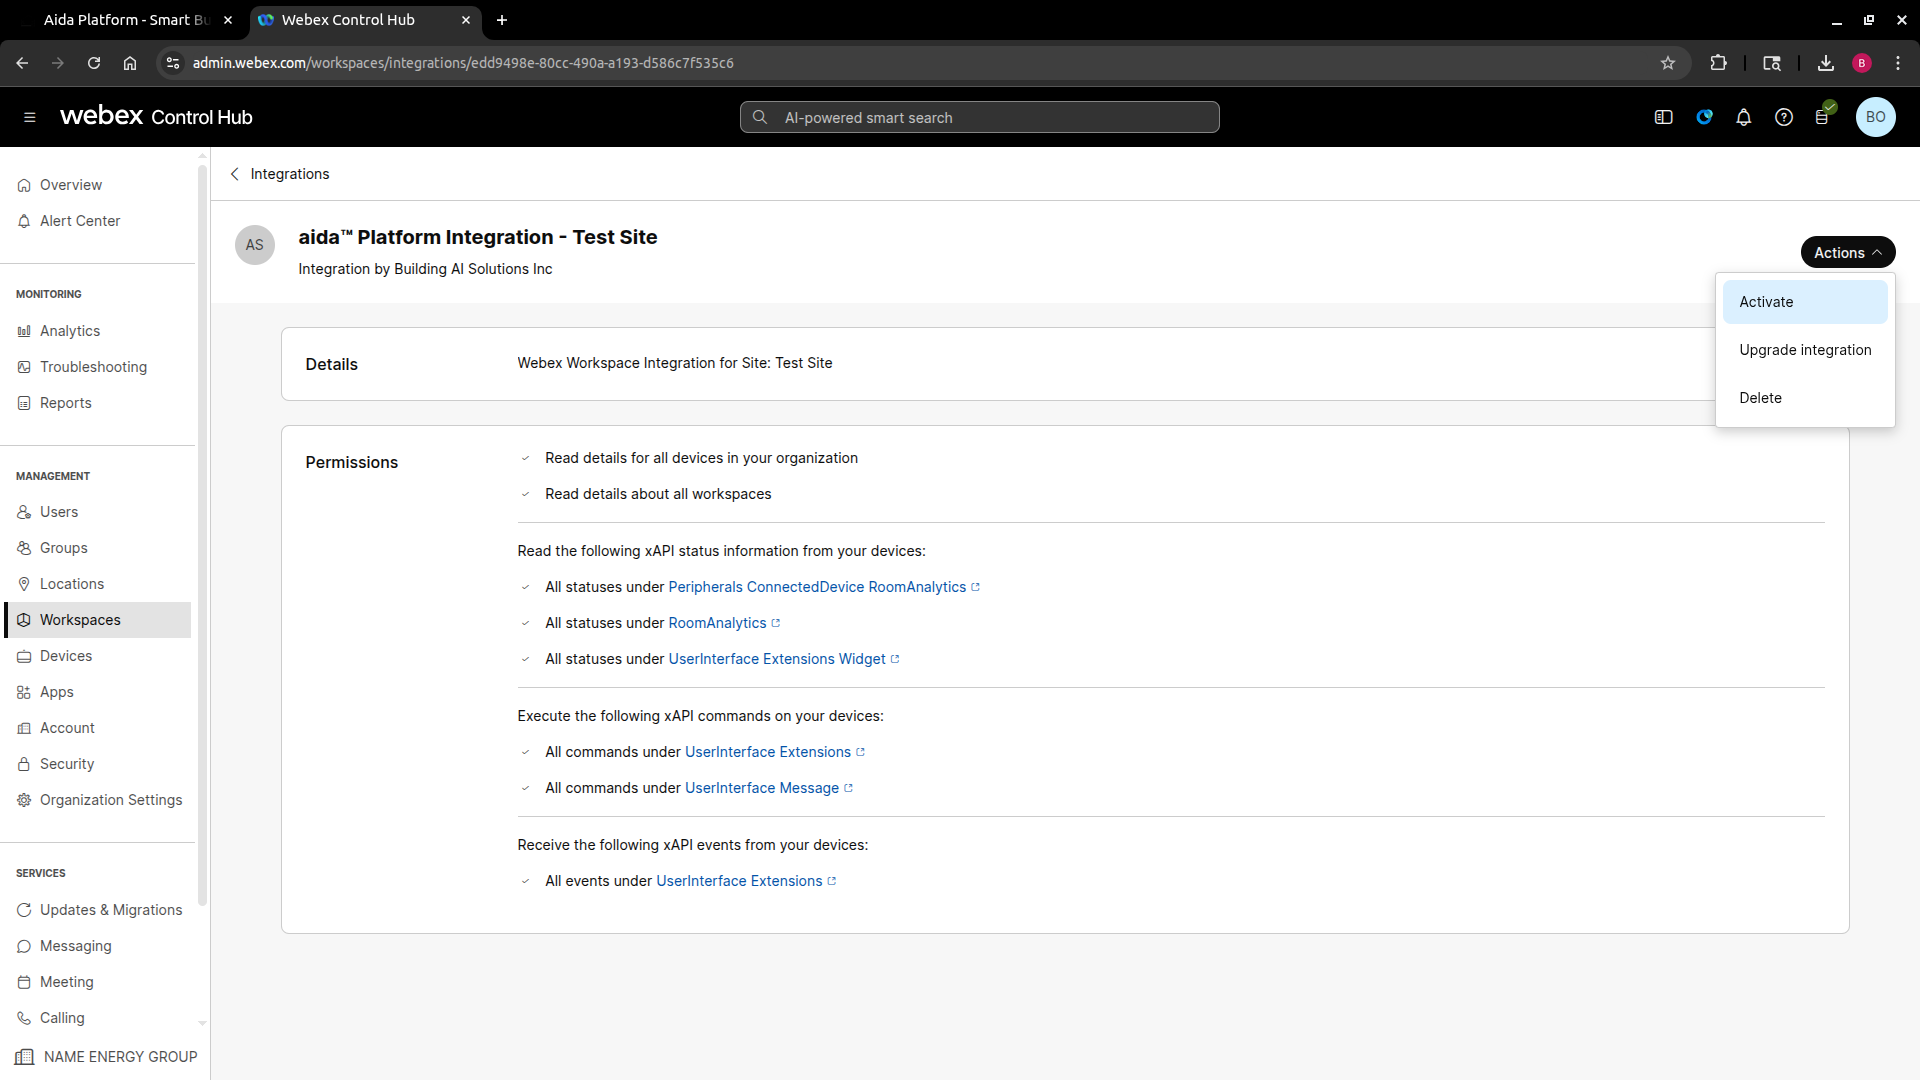
- Click "Activate" to enable the integration
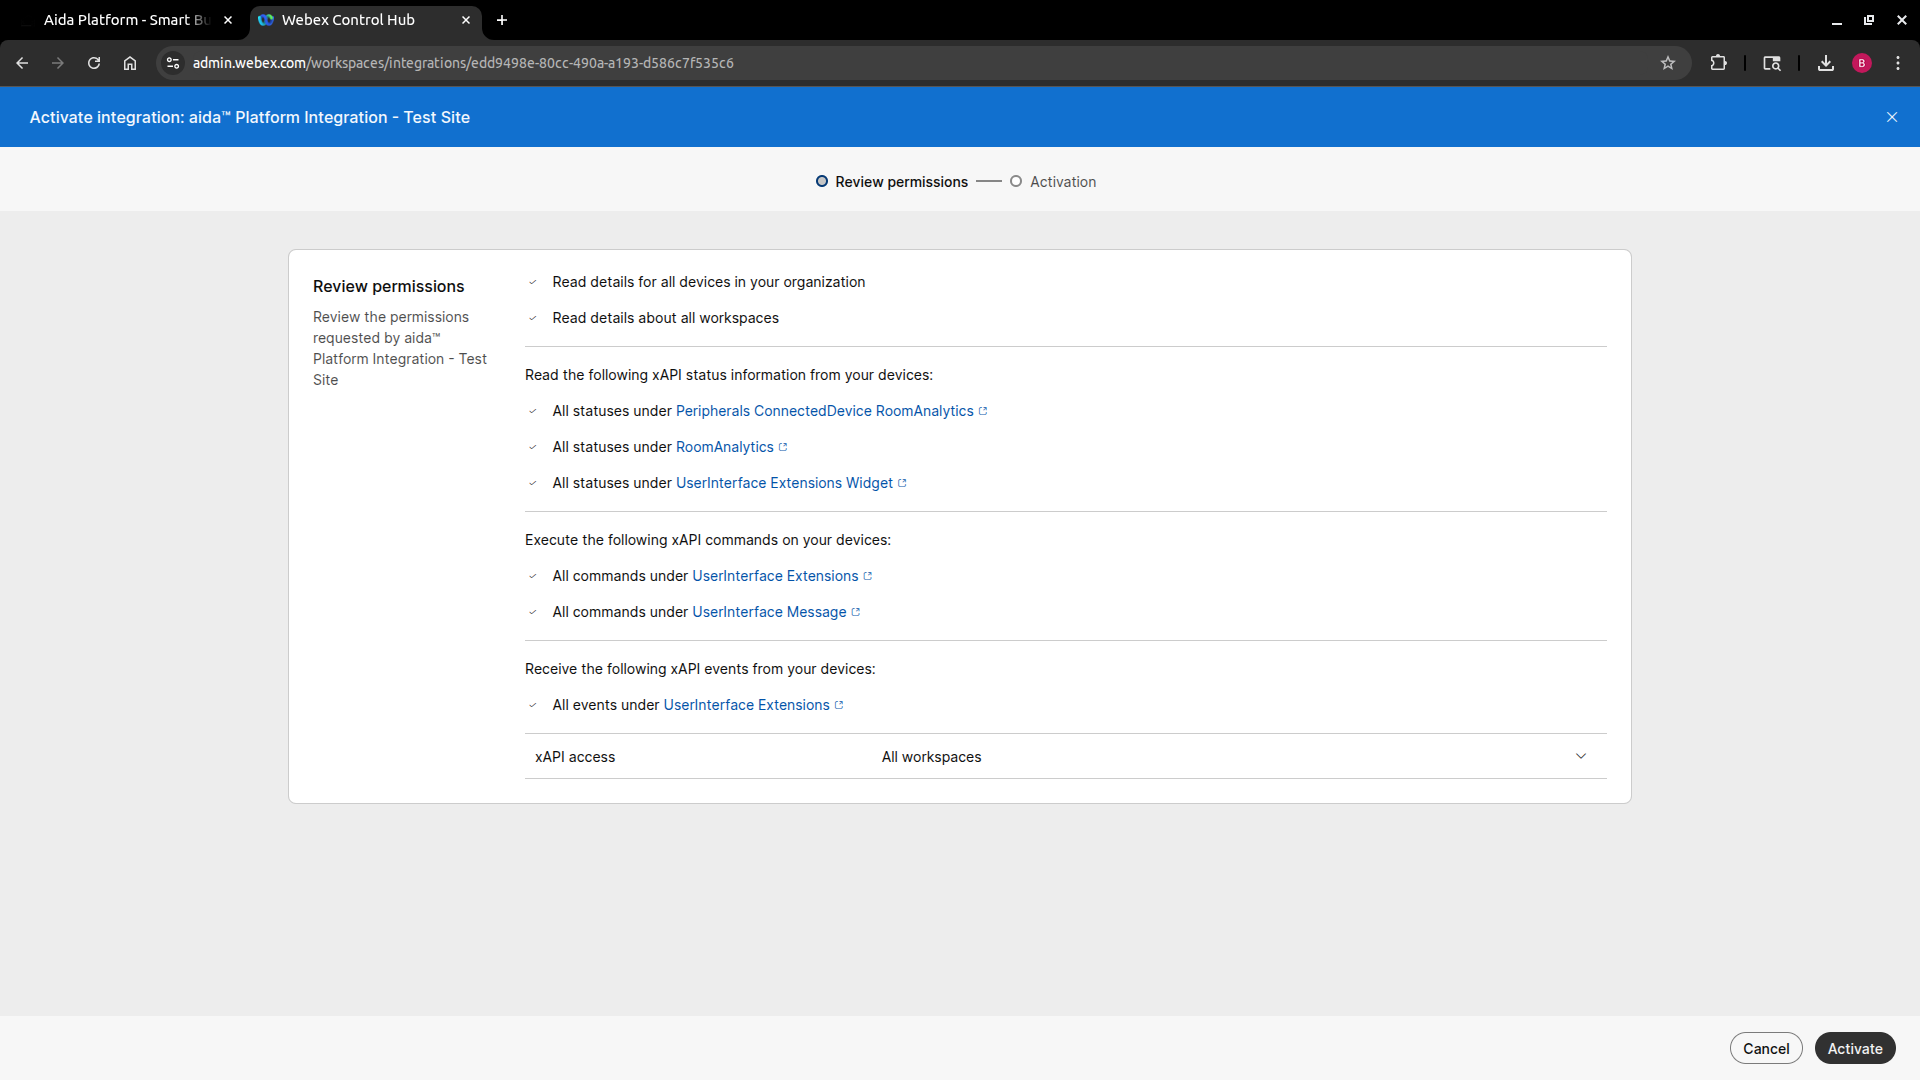
- Click "Done"
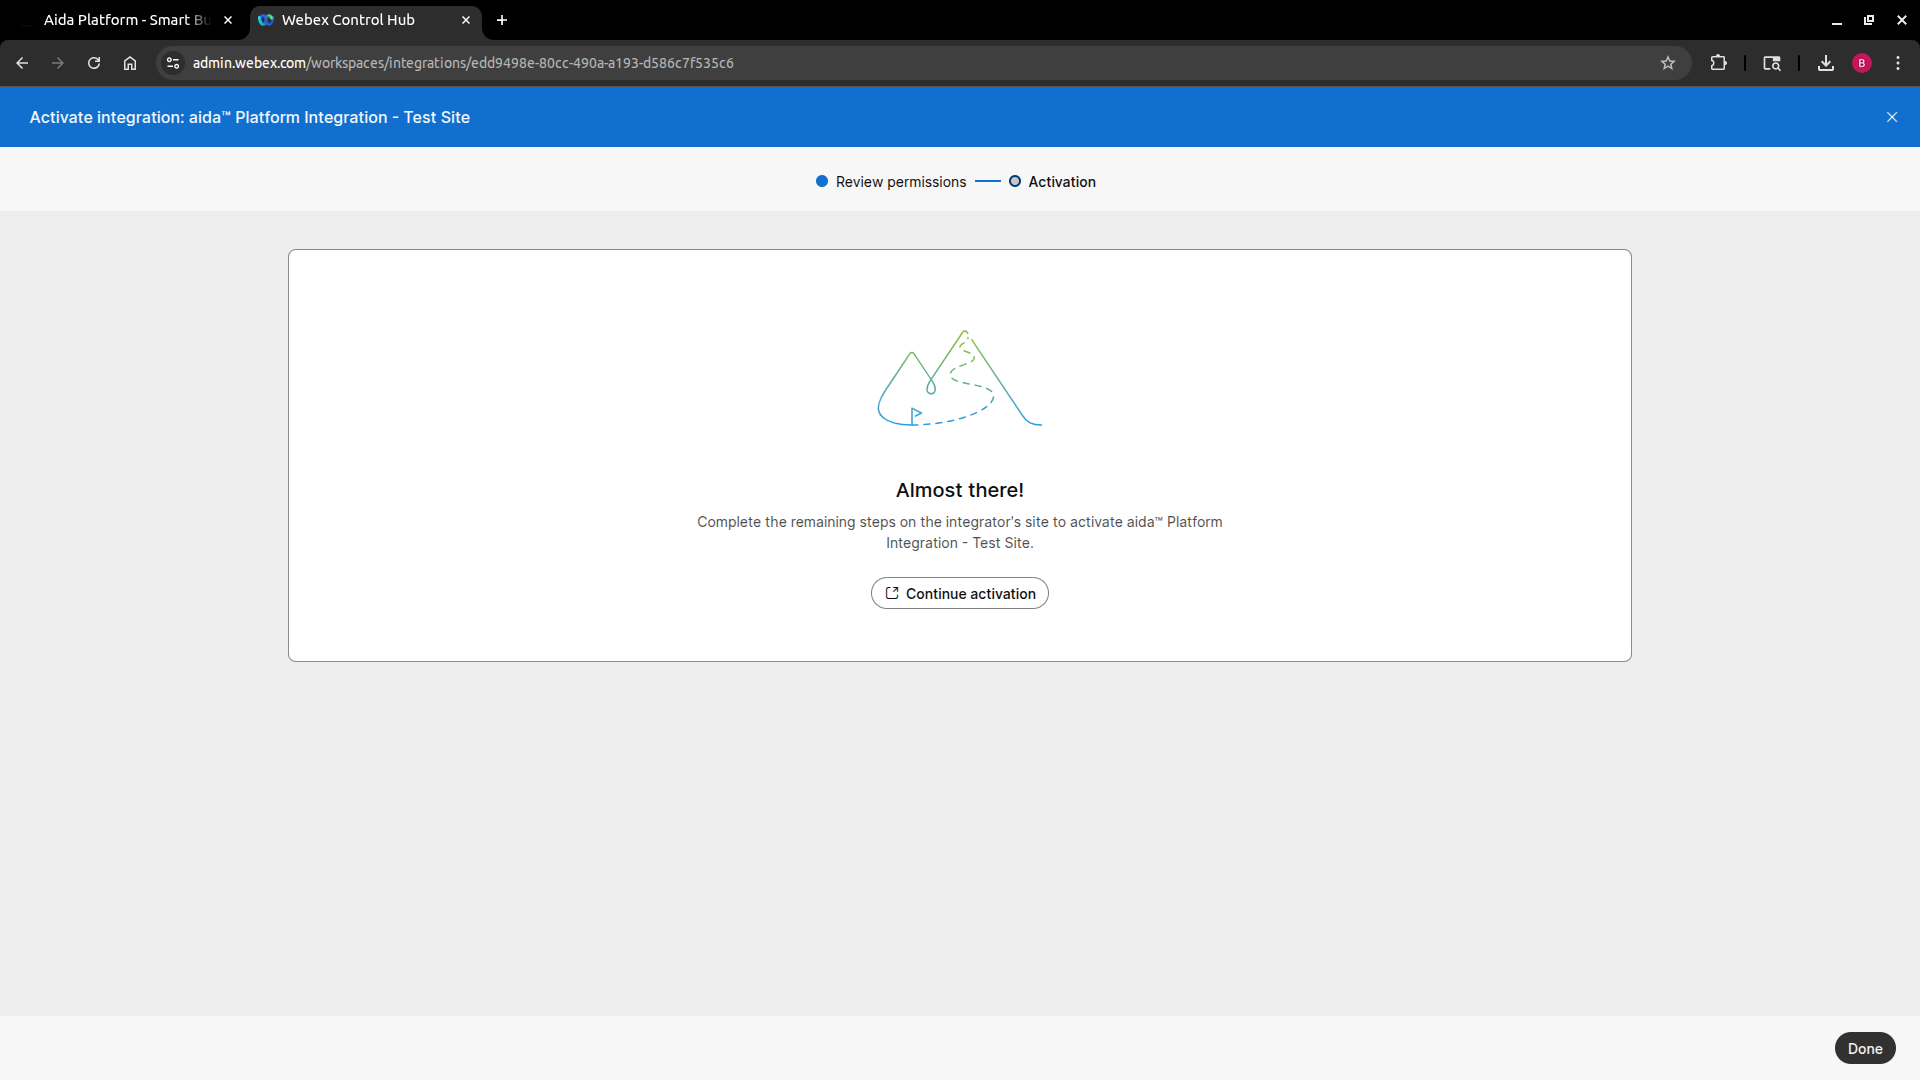
- Verify "Active"
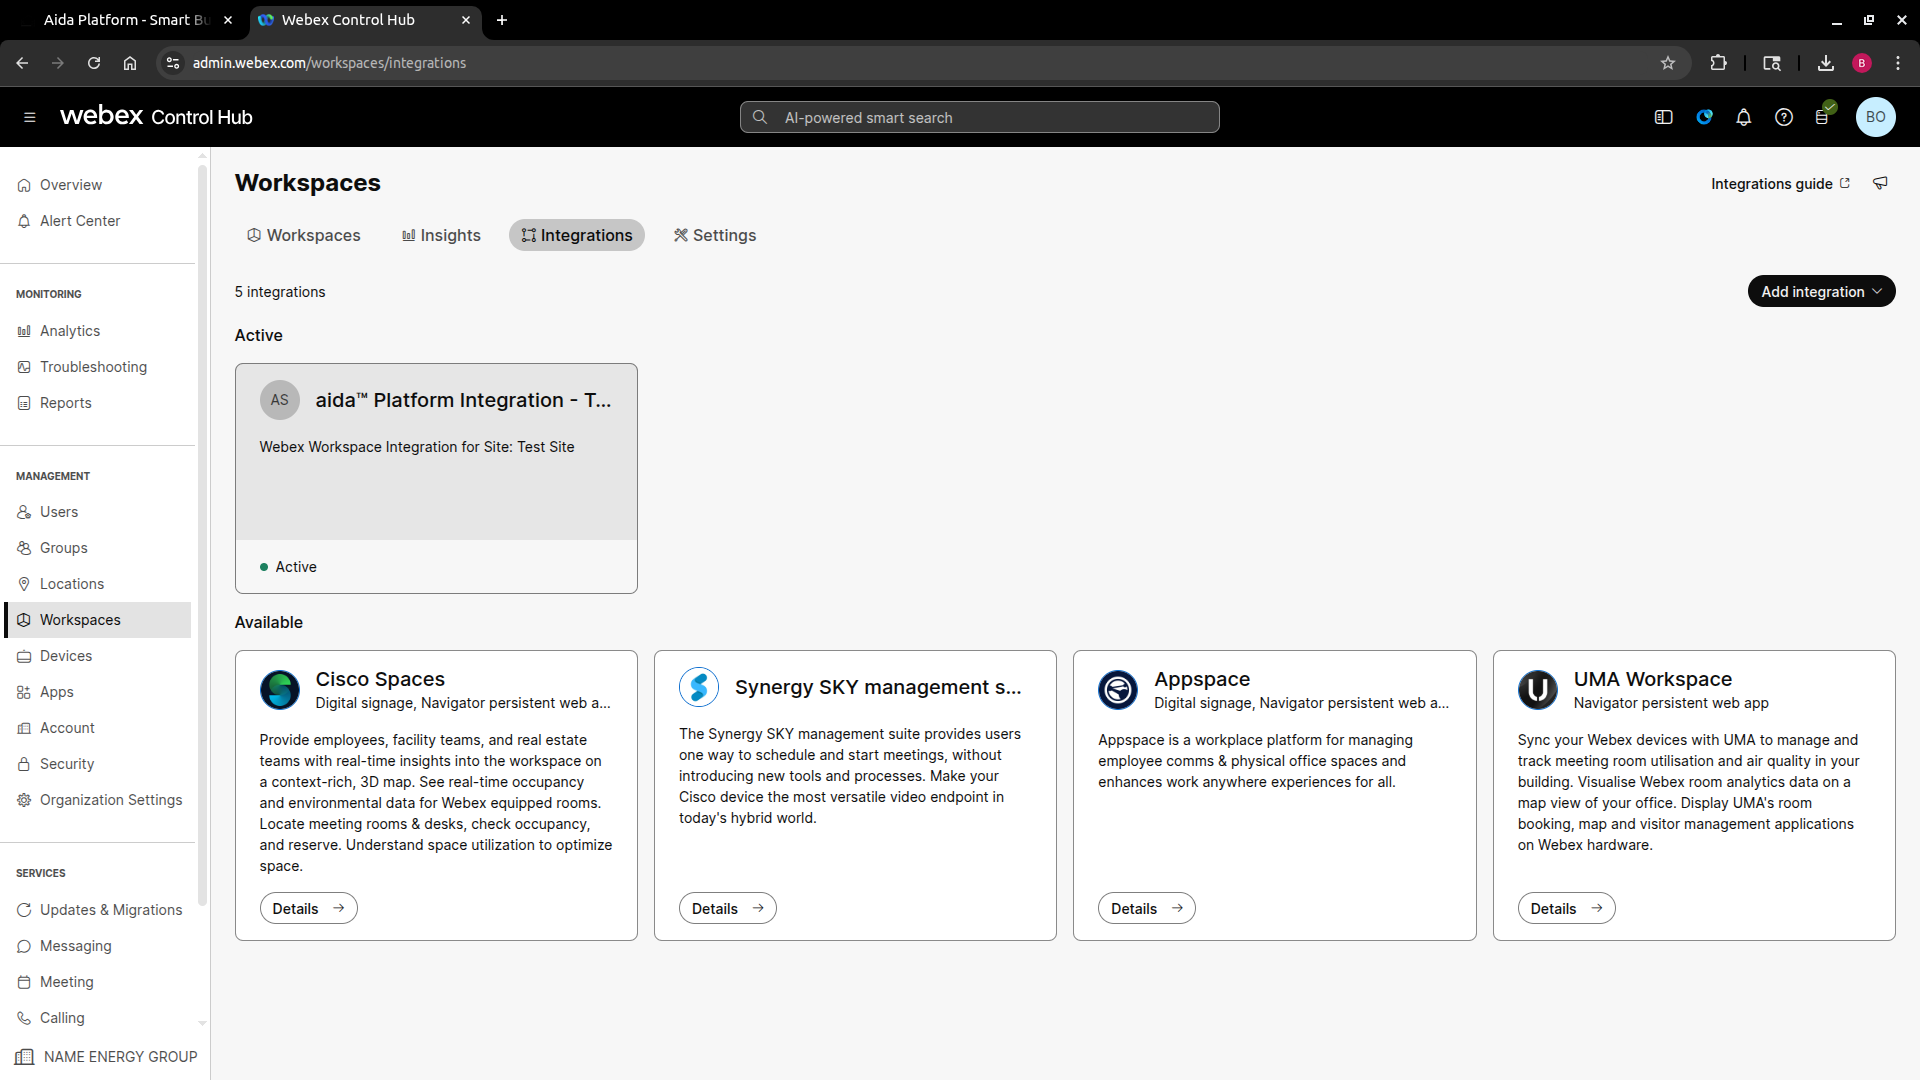
-
Verify Integration Status
- In Aida Platform, check that the integration shows "Active"
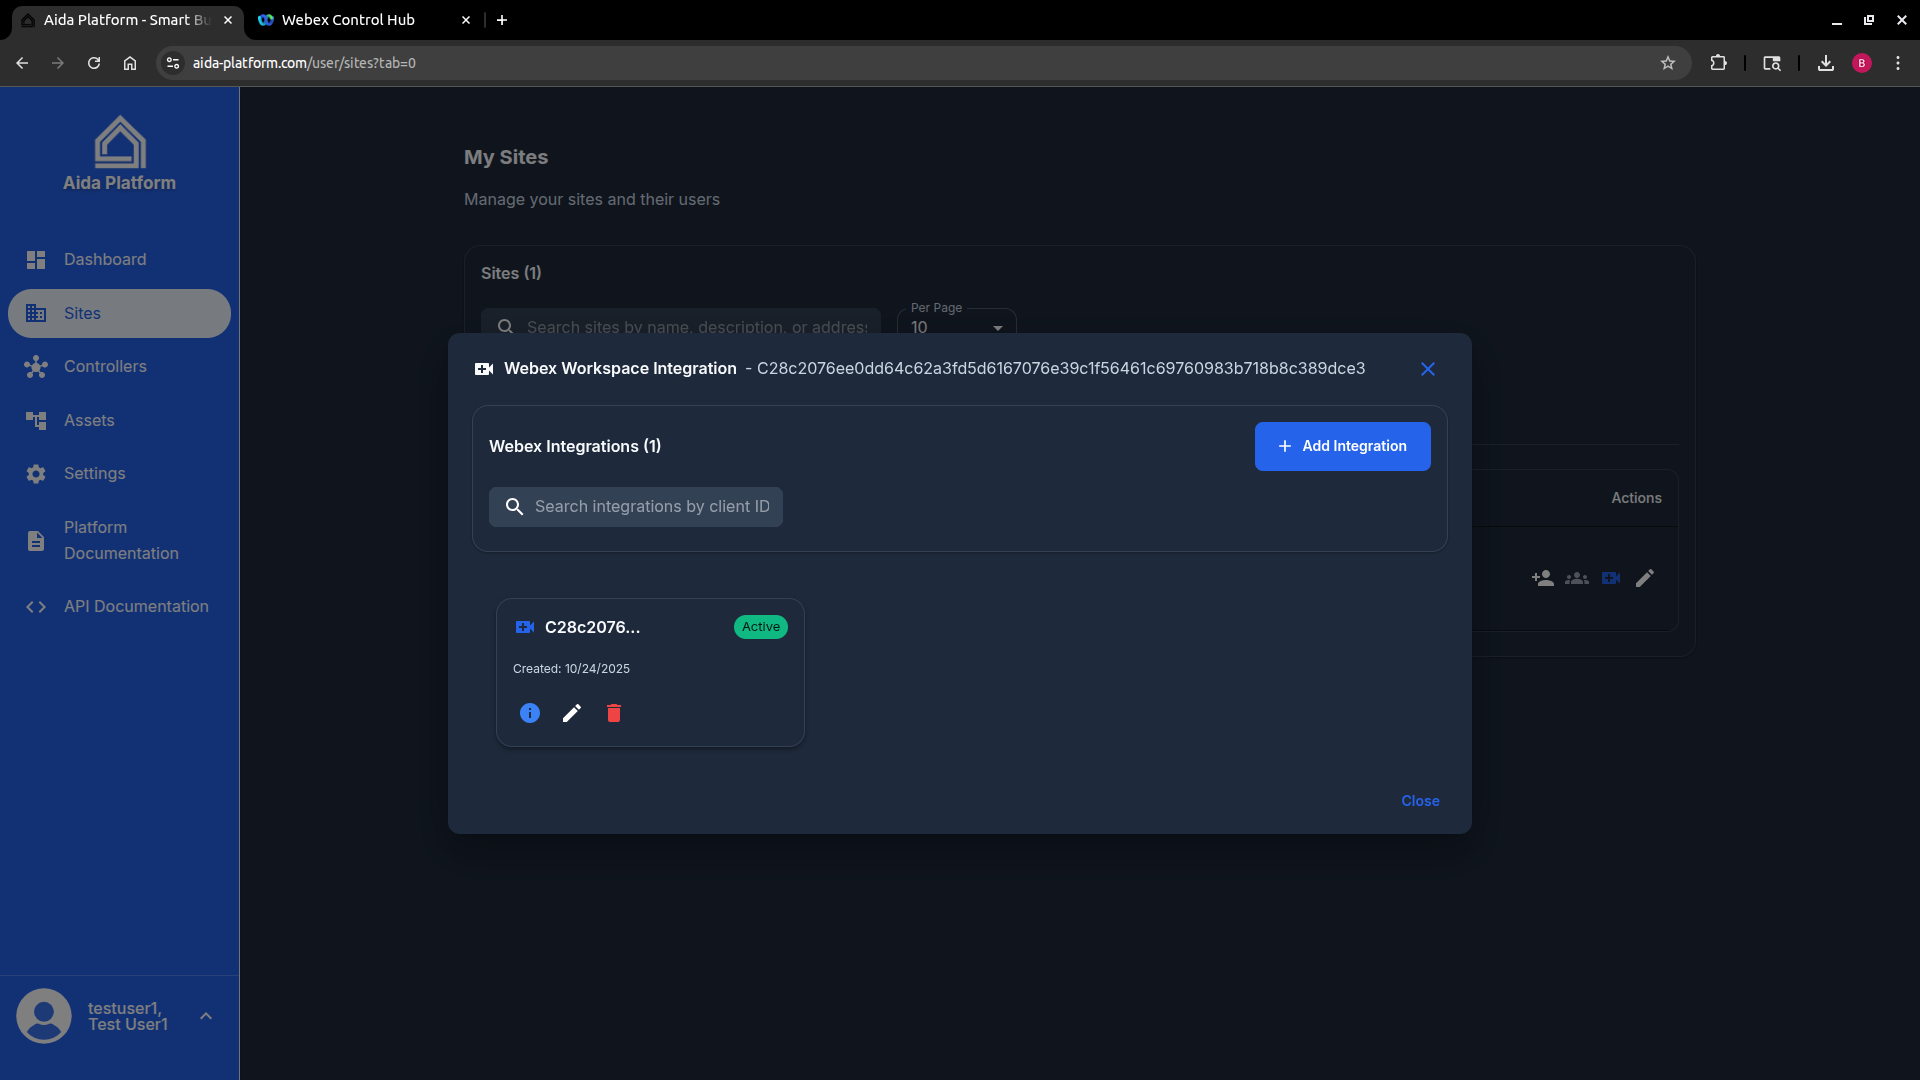
- Integration Status "Active"
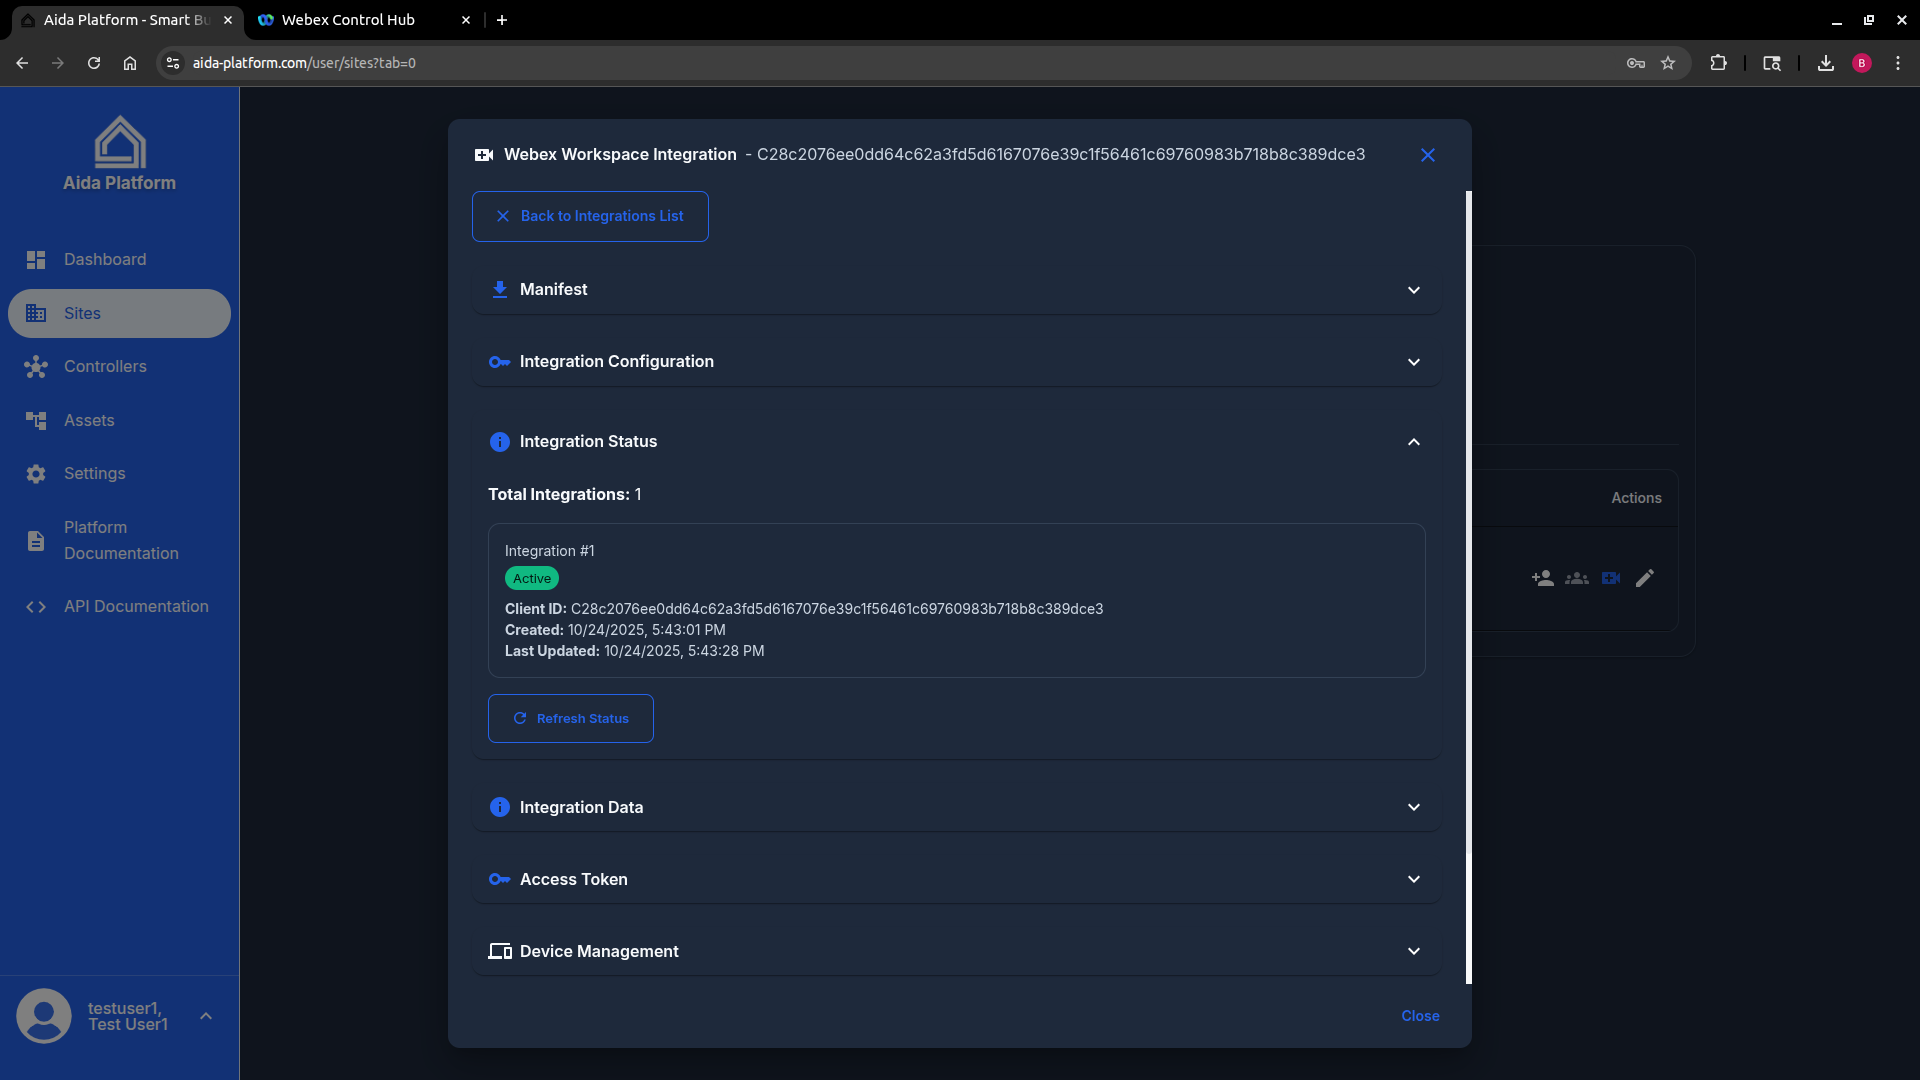
- In Aida Platform, check that the integration shows "Active"
Step 4: Device Management
- Discover Webex Devices
- In the Webex Integration dialog, go to "Device Management"
- Click "Refresh Devices" to discover available Webex devices
- The system will list all Webex devices in your organization
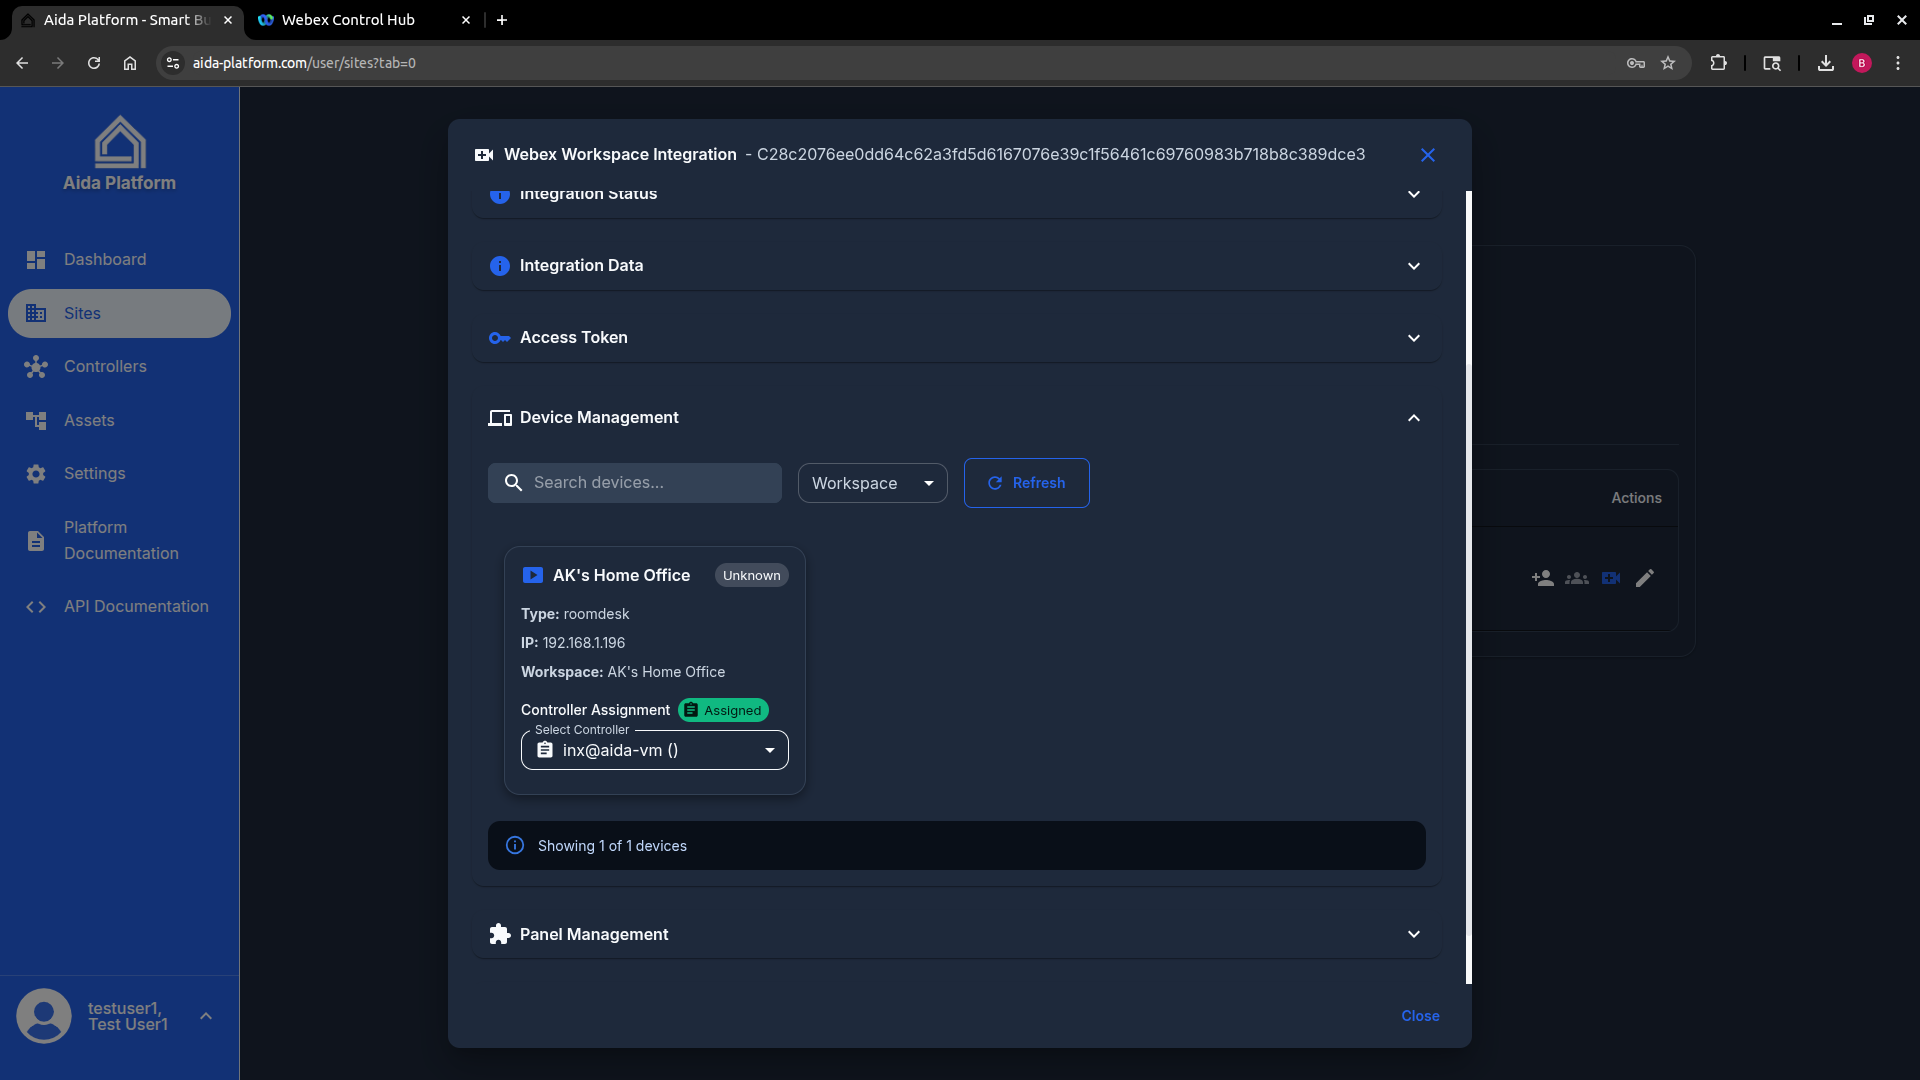
- Assign Controllers
- Select a Webex device from the list
- Choose an Aida Controller to assign to the device
- Click "Assign Controller" to link the device to the controller
- Repeat for all devices you want to control
Step 5: Panel Configuration
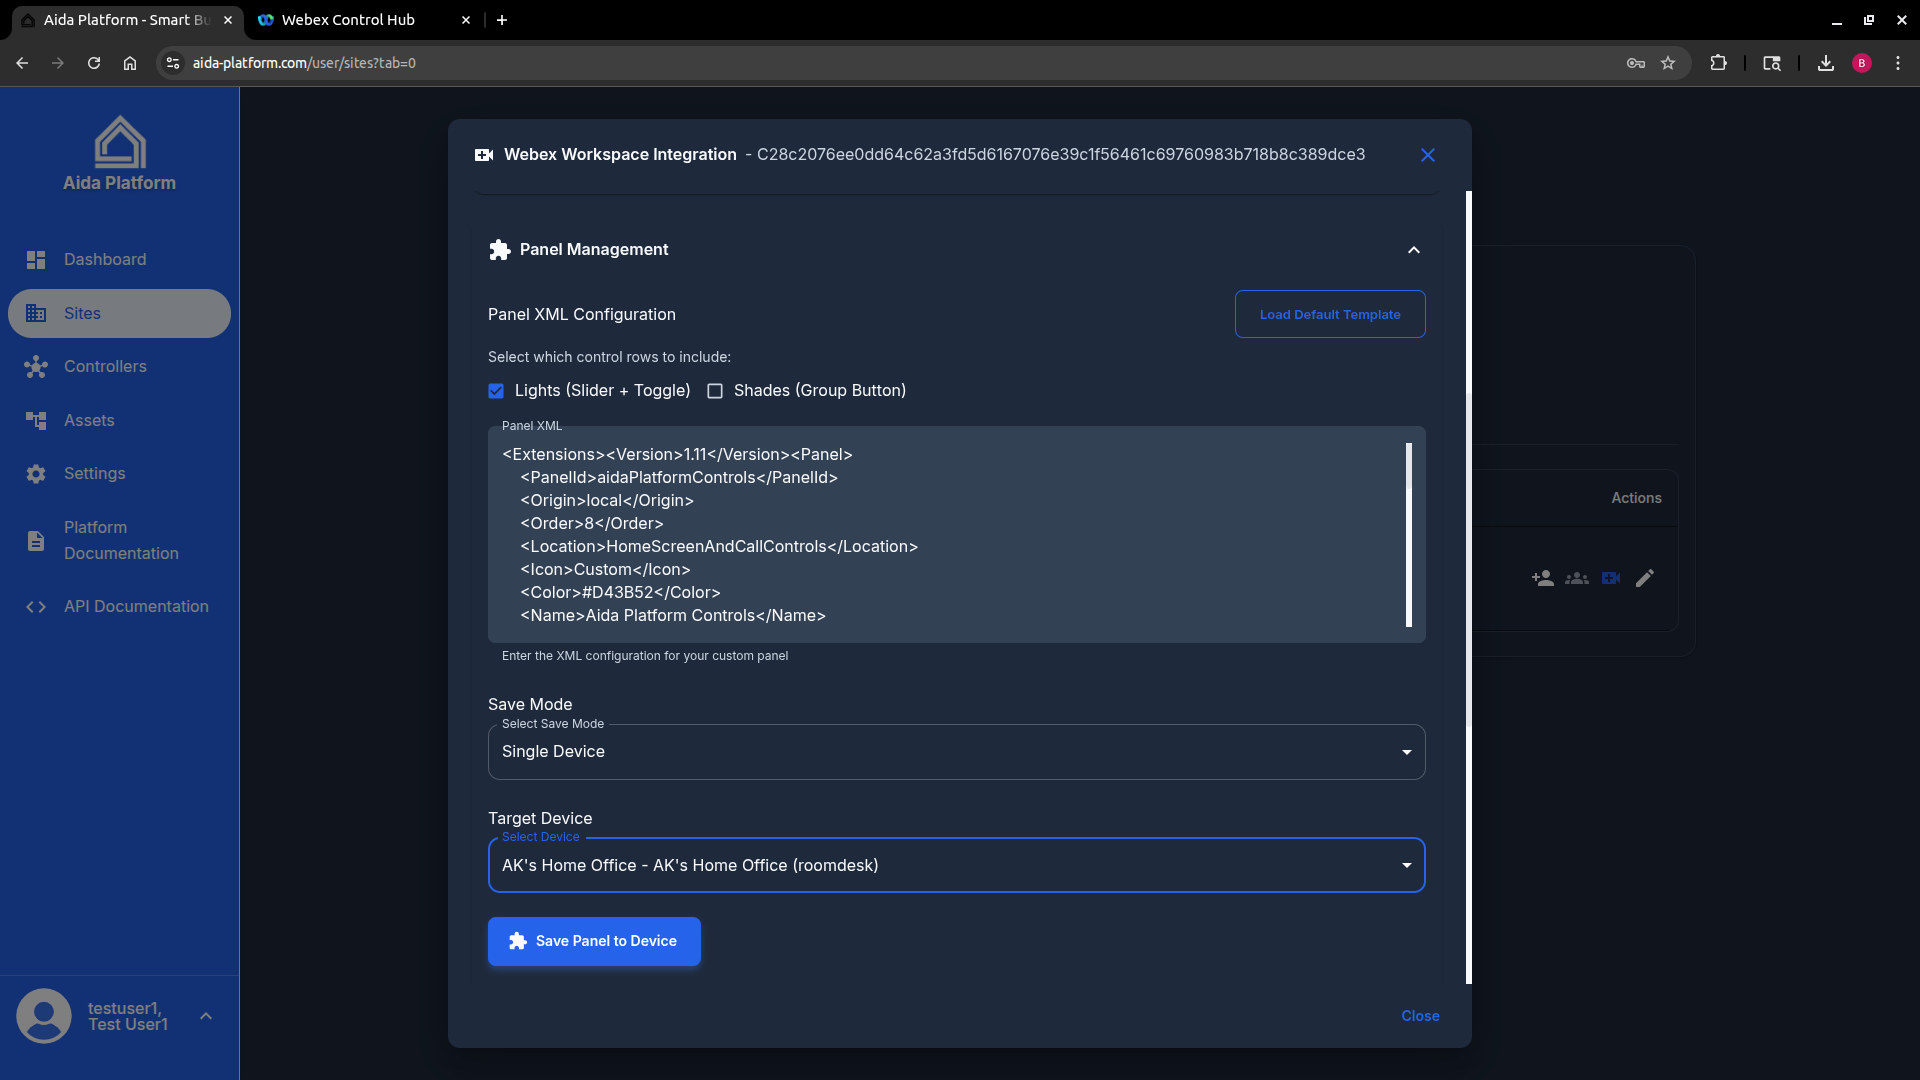
- Load Default Template
- Go to "Panel Management" in the integration dialog
- Click "Load Default Template" to get started with basic controls
- The template includes common building automation controls
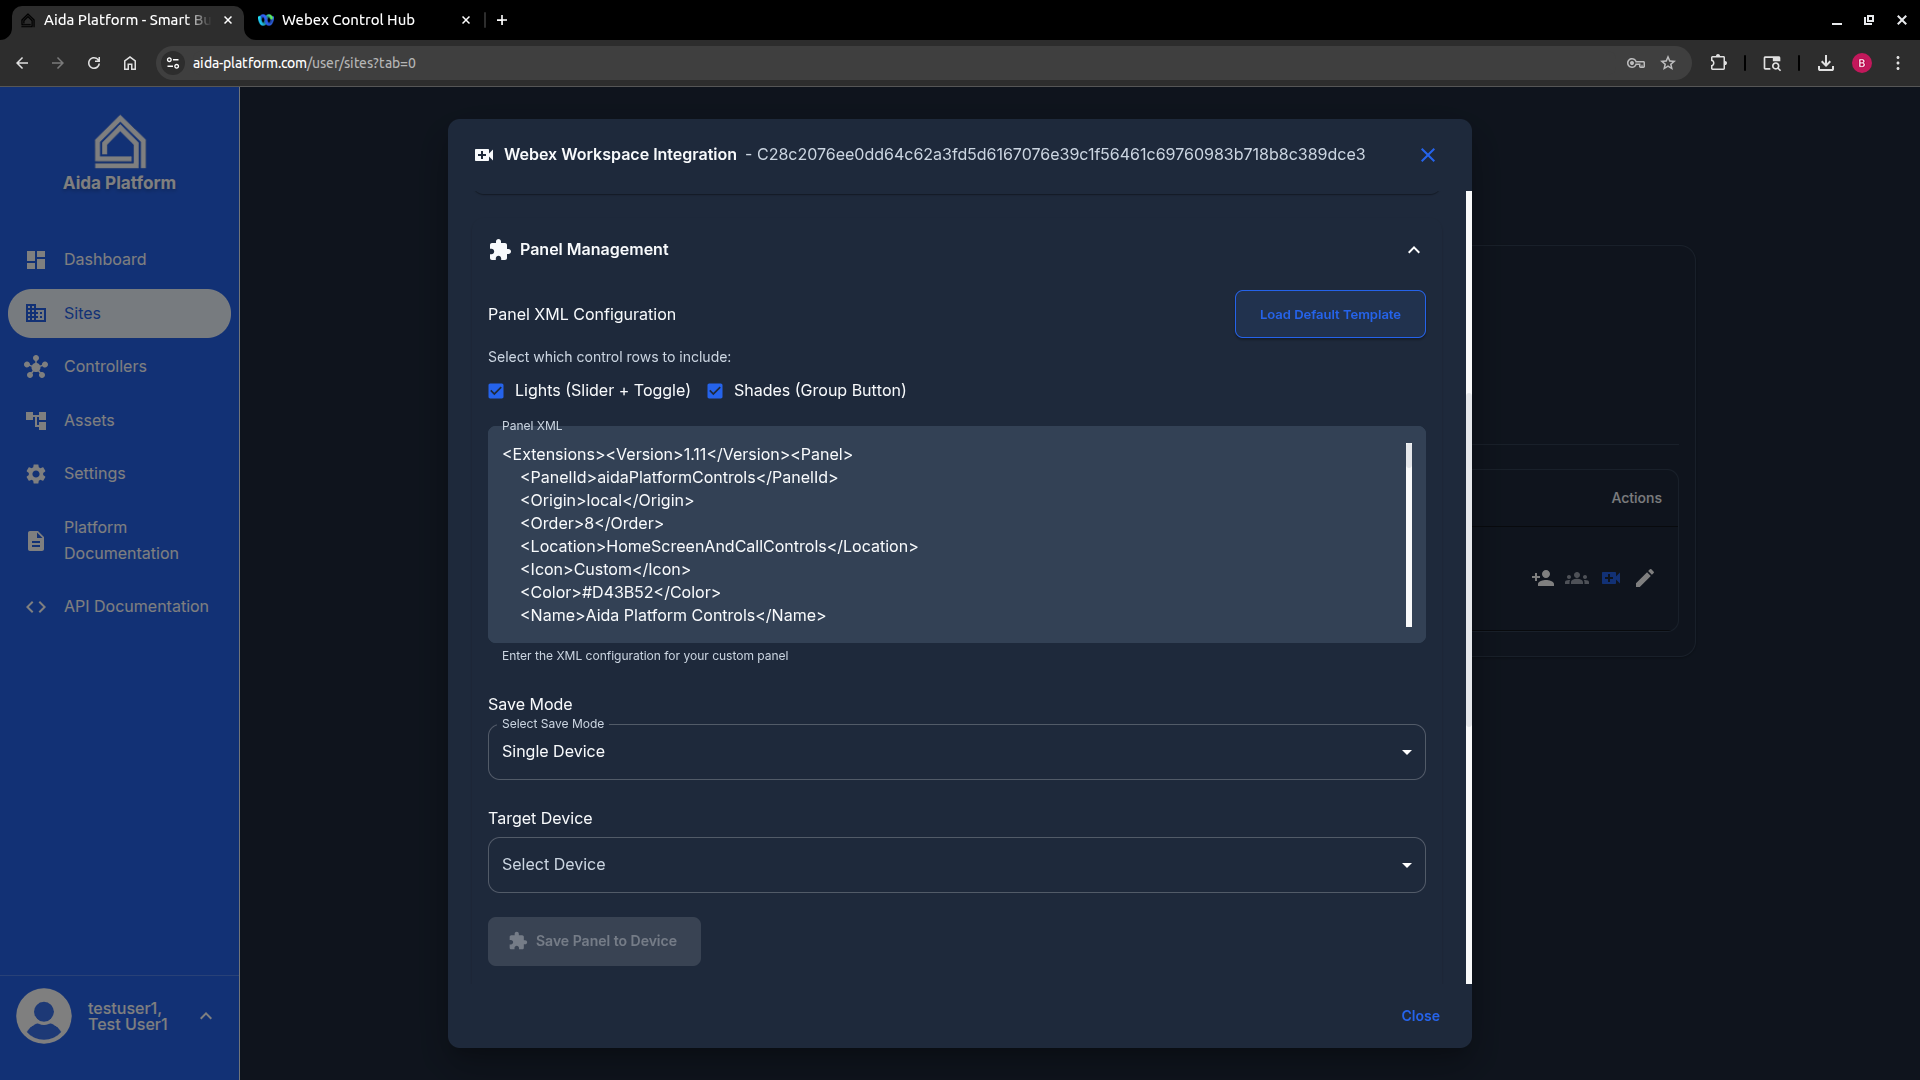
- Customize Panels
- Select specific devices to configure
- Choose control types (lights, shades, HVAC, etc.)
- Configure button layouts and control parameters
- Save panels to specific devices
- Test Panels
- Use the "Panel Test" feature to verify controls work
- Test individual buttons and control sequences
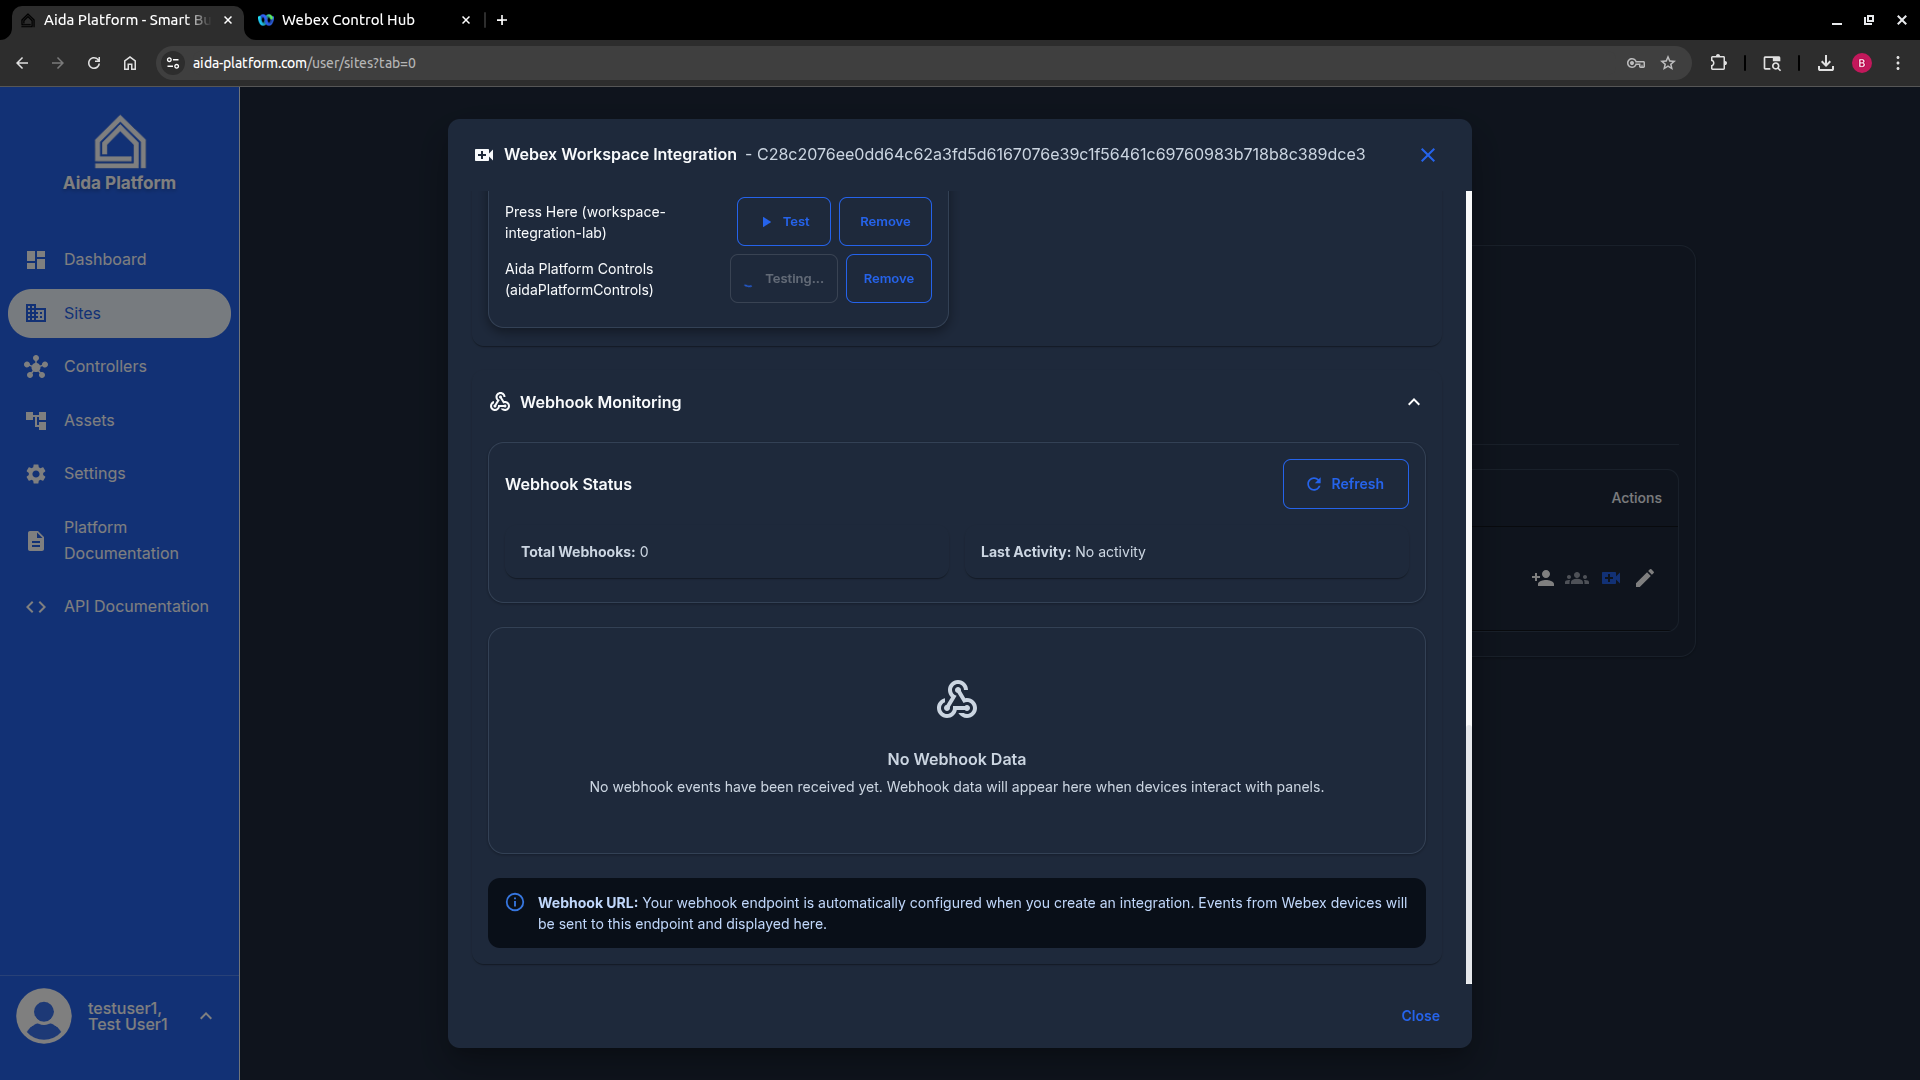
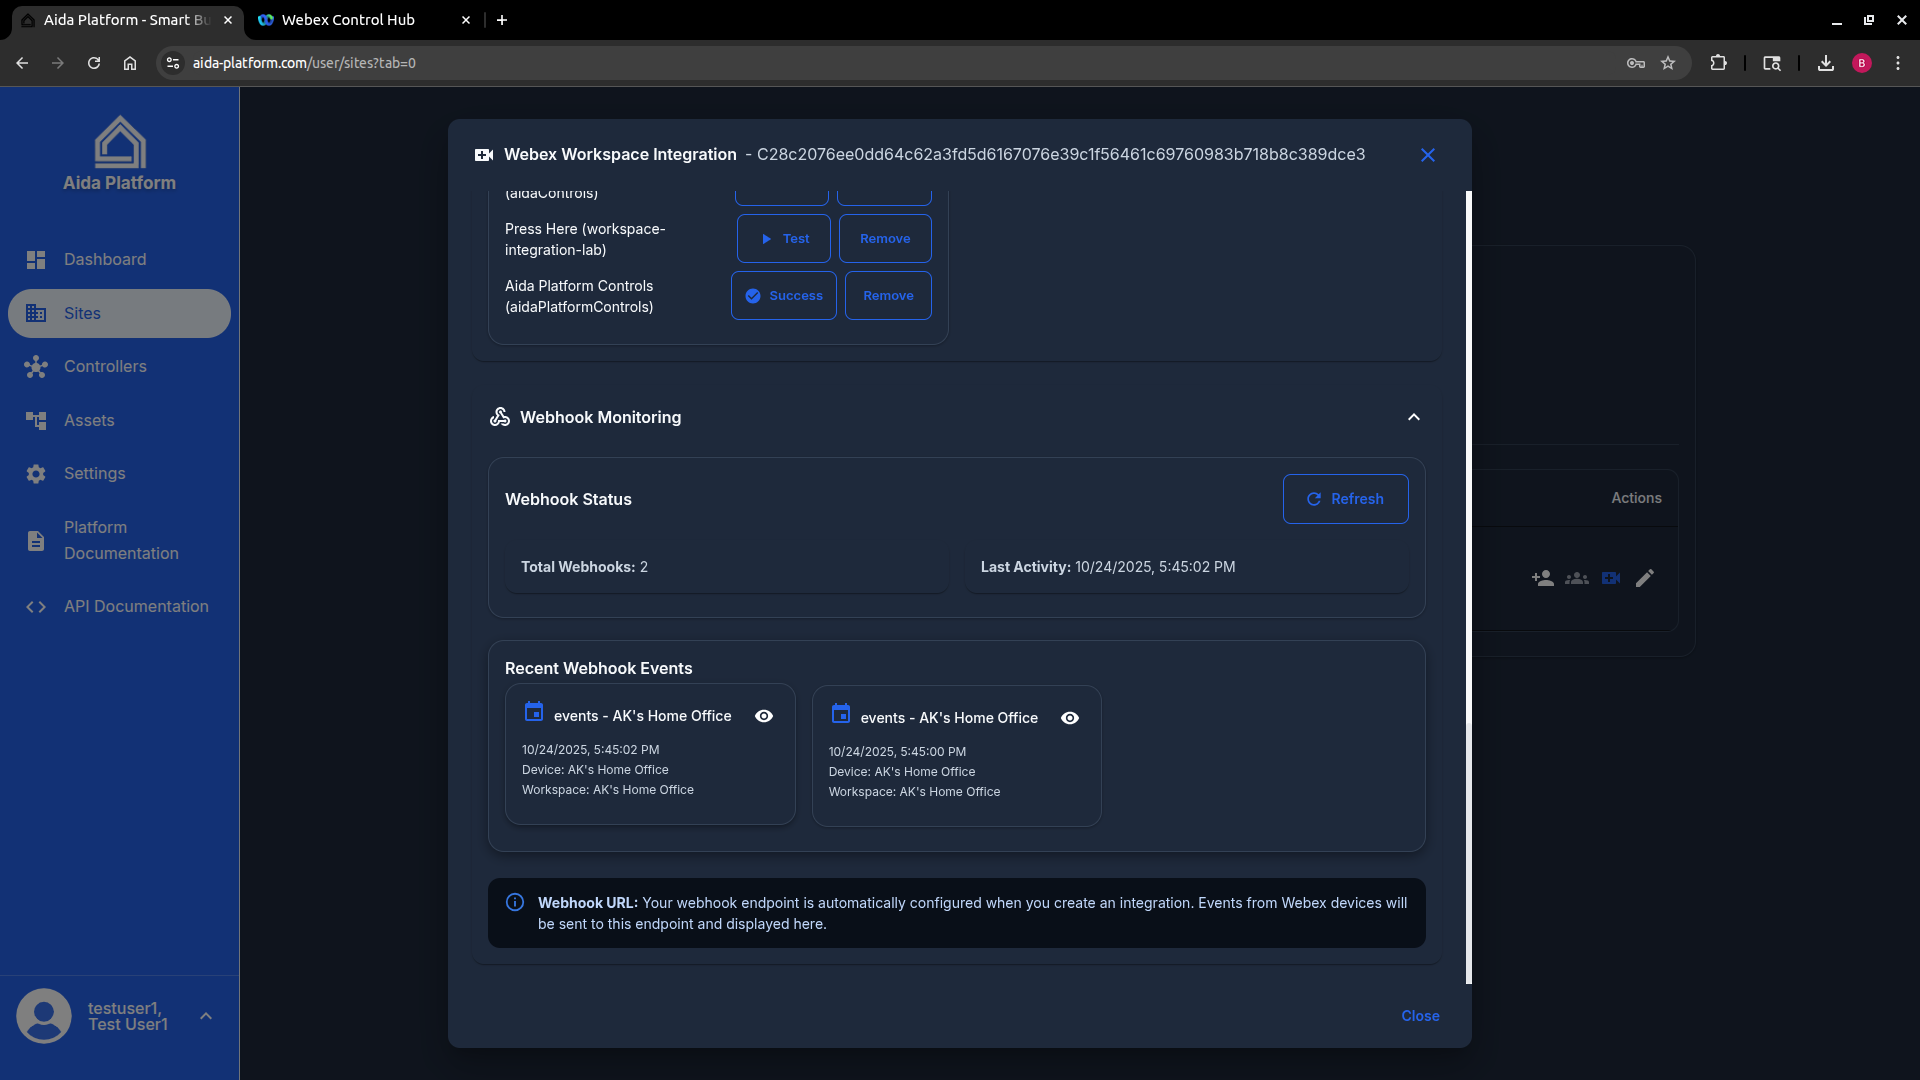
- Monitor webhook events to confirm successful communication
Voice control (optional — Step 6)
Touch panel control uses the Workspace Integration configured above. Voice control is an extension of that same Aida integration — not a second manifest or Aida site setup.
| Touch (Steps 1–5) | Voice (Step 6) | |
|---|---|---|
| Cisco Control Hub | Workspaces → Integrations | Workspace → Assistant Skills |
| Aida Platform | Webex Integration UI | Same UI — shared devices & controllers |
| User action | Tap panel widgets | Ok Webex, tell Aida … |
Prerequisites for voice: Workspace integration active, touch controls verified, devices assigned, panel deployed.
See Webex Assistant — Aida Voice Skill for setup, commands, and troubleshooting. Enable voice only after panel buttons work correctly.
Configuration Options
Panel Types
The integration supports various panel configurations:
- Lighting Controls: Dimmer controls, on/off switches, scene controls
- Shade Controls: Open/close, position control, preset positions
- HVAC Controls*: Temperature adjustment, fan speed, mode selection (*coming soon)
- Security Controls*: Door locks, access control, alarm systems (*coming soon)
- Custom Controls*: Any building system accessible via the Aida Controller (*coming soon)
Device Assignment
- Single Device: Assign one aida controller to each Webex device
- Multiple Devices: Assign same controller to multiple Webex devices
- Zone-based: Aida controller will manage grouping of controlled devices
Monitoring and Troubleshooting
Webhook Monitoring
- View Webhook Events
- Go to "Webhook Monitoring" in the integration dialog
- View real-time webhook events from Webex devices
- Monitor device interactions and system responses
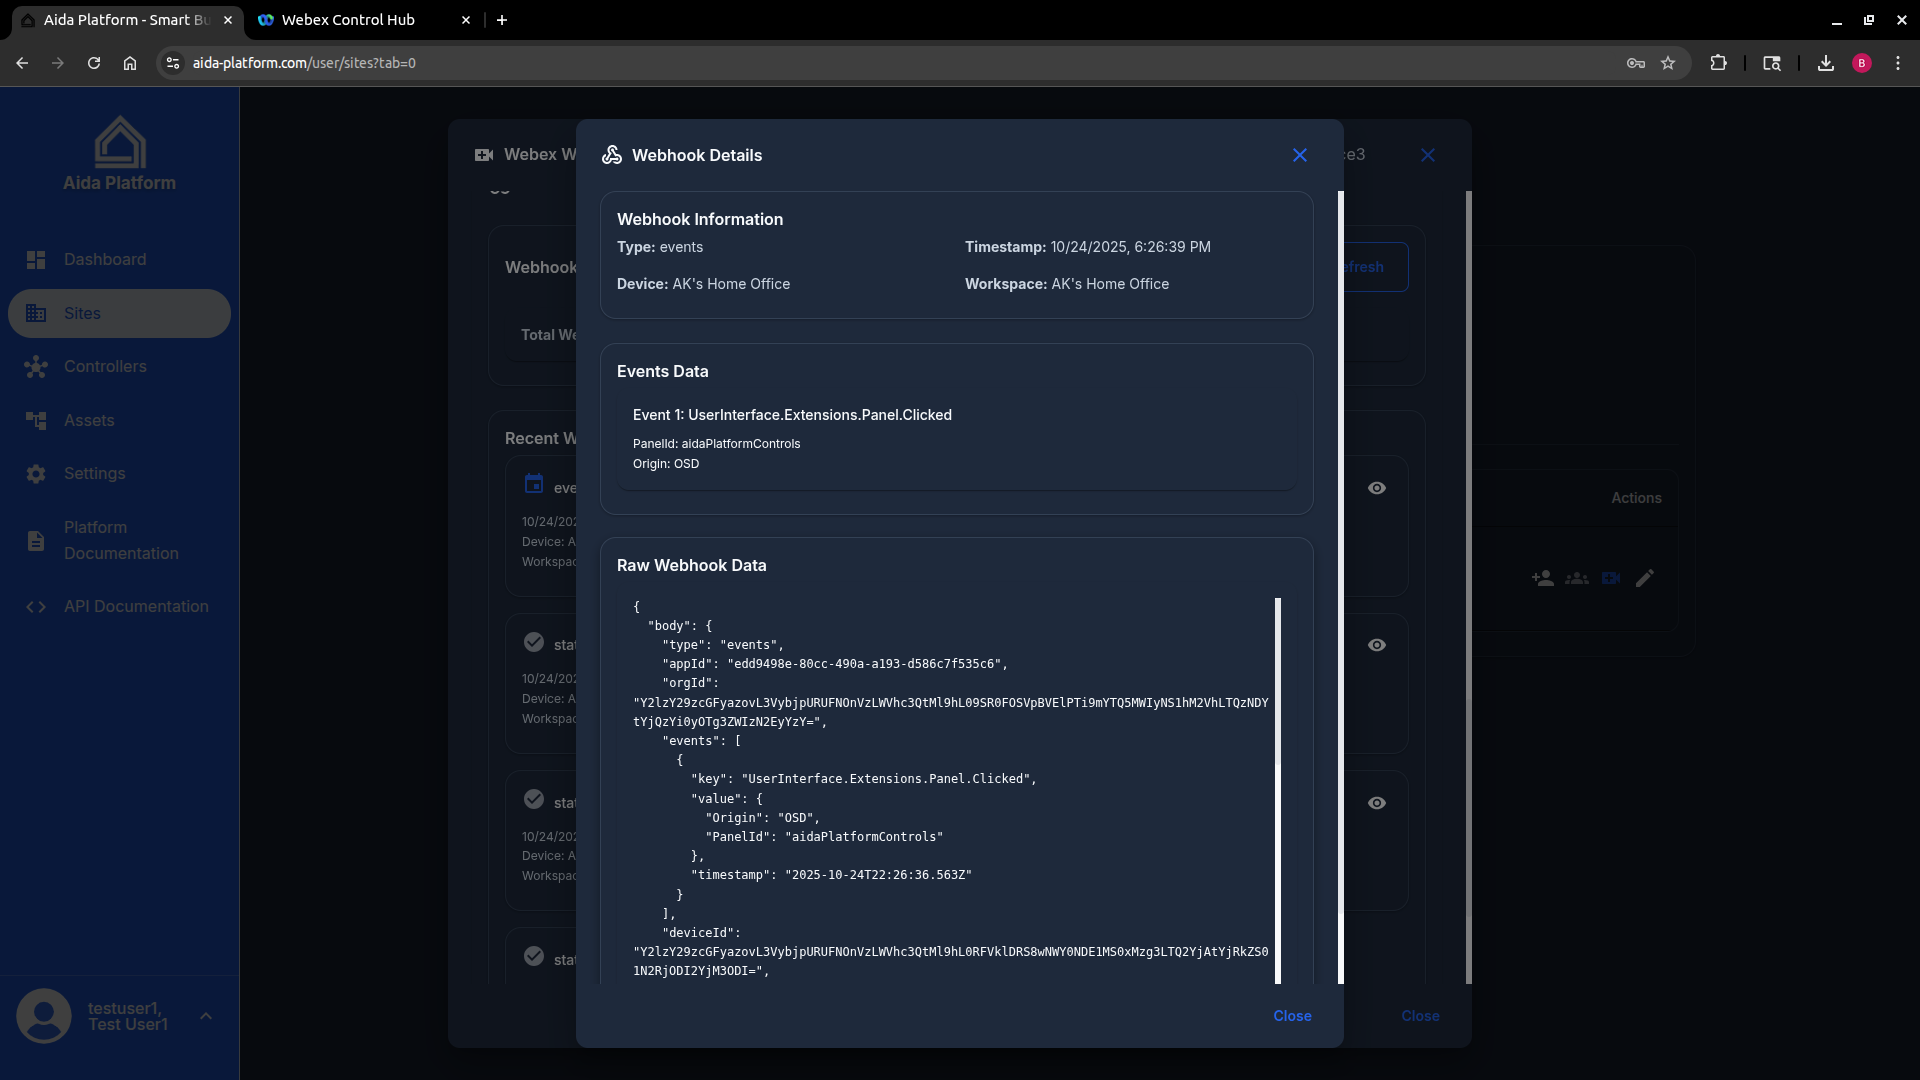
- Event Details
- Click on individual webhook events to see detailed information
- View JSON payload data for debugging
- Track device status changes and control commands
Common Issues
Integration Not Activating
- Verify Client ID and Client Secret are correct
- Check that the manifest file was uploaded successfully
- Ensure webhook URL is accessible from Webex (platform cloud URL or local controller URL, depending on architecture)
Local webhook not received (on-premises architecture)
- Confirm Webex devices can reach the controller IP/hostname on the building LAN
- On Controller 2.0, verify the Webex Control Hub module is enabled
- Use
POST https://<controller-host>/api/v1/webex/webhookas the webhook URL in the integration form - Check controller Webex event logs for unmatched
device_idor widget mappings
Devices Not Discovered
- Verify network connectivity between Webex devices and Aida Platform
- Check that the integration has proper API permissions
- Ensure devices are registered in Webex Control Hub
Panels Not Working
- Verify controller assignment is correct
- Check that building systems are properly configured
- Test individual control commands
- Monitor webhook events for error messages
Security Considerations
- OAuth Tokens: Integration uses secure OAuth 2.0 authentication
- Webhook Security: All webhooks are signed and verified
- API Permissions: Integration requests only necessary permissions
- Data Encryption: All communication is encrypted in transit
Support and Maintenance
Regular Maintenance
- Monitor integration status and webhook events
- Update panel configurations as building systems change
- Review and rotate API credentials periodically
- Test integration functionality after system updates
Getting Help
- Check the webhook monitoring for error messages
- Review the integration logs for detailed error information
- Contact support with specific error messages and device information
Next Steps
After successful integration setup:
- Configure Building Systems: Ensure all building systems are properly connected to Aida Controllers
- Test Controls: Verify that all panel controls work as expected
- Train Users: Provide training to building occupants on using Webex devices for building controls
- Monitor Performance: Use webhook monitoring to track system performance and usage
- Enable Voice Control: Add the Webex Assistant — Aida Voice Skill for hands-free room commands (separate Control Hub enablement under Assistant Skills; same Aida site integration)
The Webex Workspace Integration provides a powerful way to bring building automation controls directly to Webex devices, creating a seamless experience for building occupants and facility managers.